
Linux, Apache, MySQL, & PHP(LAMP), run the Internet. These four applications are the foundational services that drive dynamic web content delivery. Public-facing services like these need a high level of security. To do this we need to cover many aspects of server hardening.
We will be building the LAMP foundation and installing the key services. There is a ton of other things we need to do to secure LAMP systems. To make this easier I have broken up the process into multiple articles.
This article is the first in the Diamond Hard LAMP series.
This guide was designed for Debian-based OSs, like Ubuntu.
LAMP Install
Time to put the “AMP” in our LAMP server! We are now installing Apache, MySQL(MariaBD), PHP(latest), and PHPMyAdmin to manage MySQL. Make sure you are using the latest versions of the software.
apt update && apt -yq dist-upgrade && apt -yq autoremove
apt install -yq phpmyadmin mariadb-server apache2 php
Automatic Updates
To ensure our servers are always up to date with the latest and most secure software versions, we can add auto-updates. Run the below command to install the required packages.
apt -y install unattended-upgrades apt-listchangesLet’s set up email notifications for changes to software versions of the system. Open the file “/etc/apt/apt.conf.d/50unattended-upgrades” with your preferred text editor. Locate the line “Unattended-Upgrade::Mail” and update with your email address. See below.
// Send email to this address for problems or packages upgrades
// If empty or unset then no email is sent, make sure that you
// have a working mail setup on your system. A package that provides
// 'mailx' must be installed. E.g. "user@example.com"
Unattended-Upgrade::Mail "admin@MyDomain.com";
In the same file, we can allow automatic reboots. Kernel updates should be the only updates that require a reboot. Personally, I prefer to do reboots manually encase anything goes wrong. So I will not be turning this feature on.
// Do automatic removal of unused packages after the upgrade
// (equivalent to apt-get autoremove)
//Unattended-Upgrade::Remove-Unused-Dependencies "false";
Finally, let’s confirm everything is working correctly. Run the below command to kick off the unattended-upgrades process in debug mode. Review the output for any errors.
unattended-upgrade -dBasic MySQL Security
The MySQL install comes with a script that will perform the basic security configurations for you. You just need to run the below script. The script will ask you to set a new root user password; the default password is empty. If you are unsure how to answer the questions the script asks, then just go with the defaults.
/usr/bin/mysql_secure_installationEvery website you host on your server should have its own database with its own username and password. A website should never use the root MySQL user account. To add a new database and user account run the following commands. You will need to change of the values to fit your needs.
# mysql -uroot -p -e "CREATE DATABASE <databaseName> /*\!40100 DEFAULT CHARACTER SET utf8 */;"
# mysql -uroot -p -e "CREATE USER <NewUsername>@localhost IDENTIFIED BY '<NewPassword>';"
# mysql -uroot -p -e "GRANT ALL PRIVILEGES ON <databaseName>.* TO '<NewUsername>'@'localhost';"
##
# Examples
mysql -uroot -p -e "CREATE DATABASE bigbob_com /*\!40100 DEFAULT CHARACTER SET utf8 */;"
mysql -uroot -p -e "CREATE USER bbob@localhost IDENTIFIED BY 'B0b5PassVV';"
mysql -uroot -p -e "GRANT ALL PRIVILEGES ON bigbob_com.* TO 'bbob'@'localhost';"
PHPMyAdmin
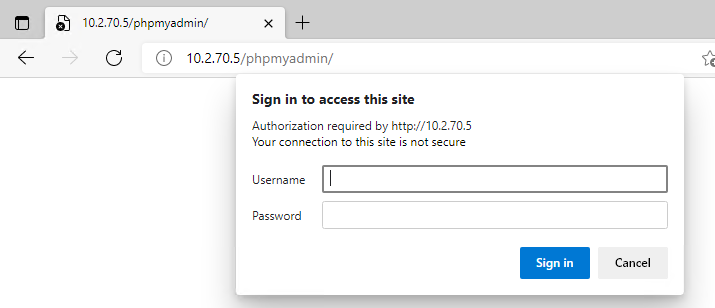
PHPMyAdmin allows anyone to access its web portal just by adding “/phpmyadmin/” to the end of the URL. This is not secure and allows an attacker to brute-force our MySQL usernames and passwords. We need another layer of security for the web portal. A quick and easy way is to add a “.htaccess” file to the root web directory of the PHPMyAdmin Portal. With the “.htaccess” file we can add an additional username and password before the user can access the PHPMyAdmin Portal.
We need to create a username and password database that will hold the login for anyone we want to have access to the PHPMyAdmin Portal.
# Create a folder to hold ".htpasswd" database.
mkdir /etc/apache2/.secret
# Set the folder permissions.
chmod 755 /etc/apache2/.secret
# Create the ".htpasswd" database and add a new user. Passwords hashed in BCrypt
htpasswd -B -C 10 -c -b /etc/apache2/.secret/.htpasswd "pma_admin" "5up3rG00dPVV!"
# Set the required permissions and owner on ".htpasswd" database.
chmod 644 /etc/apache2/.secret/.htpasswd
chown root:root /etc/apache2/.secret/.htpasswd
Now that we have the User database built, we will make the “.htaccess” file to enforce our new user login. Run the below command.
# PhpMyAdmin .htaccess file build.
echo "AuthType Basic" \
"AuthName 'Enter you UserName & Password.'" \
"AuthUserFile /etc/apache2/.secret/.htpasswd" \
"Require valid-user" > "/usr/share/phpmyadmin/.htaccess"
Lastly, we need to edit the PHPMyAdmin Apache config to allow “.htaccess” to override the Apache main configuration settings. We need to add a line to PHPMyAdmin’s Apache site config file; “/etc/apache2/conf-enabled/phpmyadmin.conf”. Open the file and add the option “AllowOverride AuthConfig”, don’t change anything else.
Alias /phpmyadmin /usr/share/phpmyadmin
<Directory /usr/share/phpmyadmin>
    Options SymLinksIfOwnerMatch
    DirectoryIndex index.php
    AllowOverride AuthConfig
</Directory>
Here are the results.
UncomplicatedFireWall
One of the most important parts of a secure server is a well-configured firewall. Ubuntu has an easy-to-use built-in firewall. Our web server should only have ports 22(SSH), 80(HTTP), and 443(HTTPS) open. Run the following commands to allow these ports and enable the firewall.
# Allow service ports 22, 80, & 443
ufw allow ssh/tcp
ufw allow 'Apache Full'
# Or allow SSH access to a limited IP range
ufw allow proto tcp from 10.10.0.1/24 to any port 22

# Enable logging, turn the firewall on, check the status of the firewall is good.
ufw logging on
ufw enable
ufw status

# Enable UFW to run at boot
systemctl enable ufw
Review and TLDR
A default Linux, Apache, MySQL, PHP(LAMP) system is not secure. We need to add and configure the software to cover the fundamental security best practices. Within this article, we added more security by…
- Set up automatic updates. Ensuring our systems have the most secure versions of software.
- Performed a secure MySQL setup. Purging unneeded data and limiting access.
- Limiting access and enforced additional authentication to internal management tools.
- Limit service port access; allowing access only to the networking ports we choose.
Related posts:
 Linux Web Server Hardening: Preventing Apache Information Disclosure
 Linux Server Hardening: Banning Malicious Traffic
 Linux Web Server Security Hardening Checklist
 Operating System Hardening 101
1 Pingback