

Data collection is a critical step in the Incident Response Plan. It involves gathering log data from all affected systems so that the ensuing digital forensic investigation can discover the root cause of the breach. This is also known as digital acquisition.
This blog post will discuss the data collection step of Windows-based systems’ Incident Response plan process. This process is geared toward non-cloud systems, such as traditional Virtual Machines and physical servers.
We will cover collecting and ingesting data using a digital forensic analysis tool, but I will not cover the forensic investigation itself.
Short on time, here’s the TLDR.
Read Before Starting An Incident Response

Do not begin an Incident Response engagement without knowing the end goal! The Incident Response process has to change based on the desired outcome. For example, if the goal of the DFIR is to bring legal charges, the evidence-collection process must follow rigorous standards. As a DFIR analyst, you must ensure and prove the evidence is immutable and follows a documented chain of custody.
The data collection process I have documented here would not hold up in a legal setting. However, in my experience, most company C-levels only want to answer specific questions and are not interested in legal pursuits. For example, how did the breach occur with the intent to build better defenses? Was data exfiltrated, and if so, what? If we only need to answer questions like those above, we can cut some time-consuming steps, like creating full disc images of infected systems.
IR Data Collection: Tools Review
Preparing a dedicated Incident Response toolbox is critical. My preferred approach is to have a dedicated Virtual Machine for processing evidence.
I use a Windows Hyper-V virtual machine as my DFIR analyst system. Any Windows 10/11 PC can run Hyper-V without additional licensing. You can easily copy the VM to a larger server when you have a large IR engagement. Once the investigation is complete, you can reset the VM to a clean state; avoiding cross-case contamination.
DFIR Evidence Processing VM Build
- Windows 10 VM prepared with Mandiant’s ThreatPursuit-VM build script.
The ThreatPursuit-VM is just a quick way to install the most common DFIR tools into a VM, similar to Kali, which is a quick way to build an attack VM. - Kroll Artifact Parser And Extractor (KAPE) Software. KAPE is one of the best-known tools for collecting evidence quickly without having to image an entire system.
- Kuiper is a digital Investigation Platform. Kuiper(AKA: DFIRKuiper, NOT RELATED TO “eKuiper”) ingests data from KAPE and explores the collected data.
These tools will enable us to gather and process digital forensic evidence quickly.
- Kuiper Side Note -
Kuiper is a fantastic tool, but it may not always be the right solution for the job. I have encountered issues running Kuiper at minimum specs, such as memory image processing.

When processing memory images("memory.mem" files made with WinPmem), Kuiper waits till it has enough system memory to load the complete "memory.mem" file into RAM. So this means if the "memory.mem" file is 8G in size, you need 8G of available RAM. So, if you want to process temporary memory files, a system with a lot of RAM is required, 64G to 128G. However, I have not had an issue with any other type of evidence processing.

The key benefit of Kuiper is the web UI, allowing multiple analysts to review evidence simultaneously. If you are working in a Team, Kuiper is the way to go.
Moving Data Around
The goal is to return the KAPE data to our forensic analysis ThreatPursuit-VM. The simplest way is to add another virtual disk to the ThreatPursuit-VM to store all our data and then configure the new virtual disk to be an SMB share. When we run KAPE on the breached end-points, we have it store its output zip files to the SMB share.

We will also host a “KAPE.iso” file from the SMB share. To run KAPE, we need to have the full program on the breached endpoint. We could build KAPE, zip it up, transfer it to the endpoint, unzip and run the software, or just virtually mount this ISO file.
What is KAPE
Kroll Artifact Parser And Extractor (KAPE) is a portable program that is very versatile for data collection methods. The traditional way to clone breached systems entirely is slow, cumbersome, and costly. Cloning a complete system OS drive means we need hundreds of gigabytes to store the clone, and 90% of that clone is useless to our investigation. This is how KAPE can help us. KAPE pulls just the data we need for our investigation, saving us time and the cost of storage.
Types of KAPE Collections
Target collection gathers file and folder data by directly pulling it from a hard drive or an image of the drive. It copies event logs, cache files, file and folder metadata, etc. Then, it packs all that data into a zip file.
Module execution collection allows us to utilize other third-party tools to enhance the data collection method. For example, KAPE, on its own, cannot collect temporary memory data(RAM).
Building a KAPE ISO FIle for Incident Response
Before collecting, we need to prepare the KAPE software and create an ISO file. Head to the Kroll website, complete the form, and download the KAPE zip package. Unzip the KAPE file, open PowerShell, and move into the newly extracted KAPE directory. We will now update the KAPE software and packages. Run the following commands.
PS D:\Tools\KAPE2\KAPE> .\Get-KAPEUpdate.ps1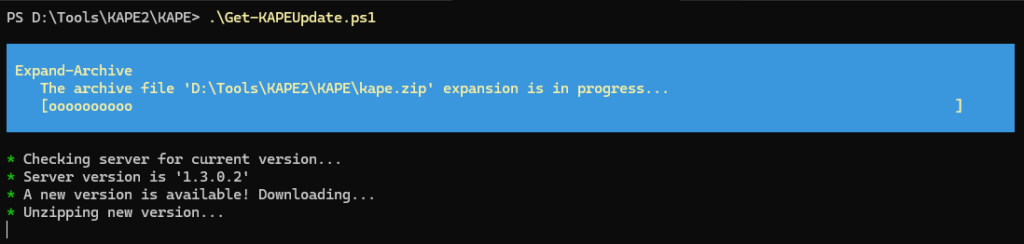
PS D:\Tools\KAPE2\KAPE> .\kape.exe --sync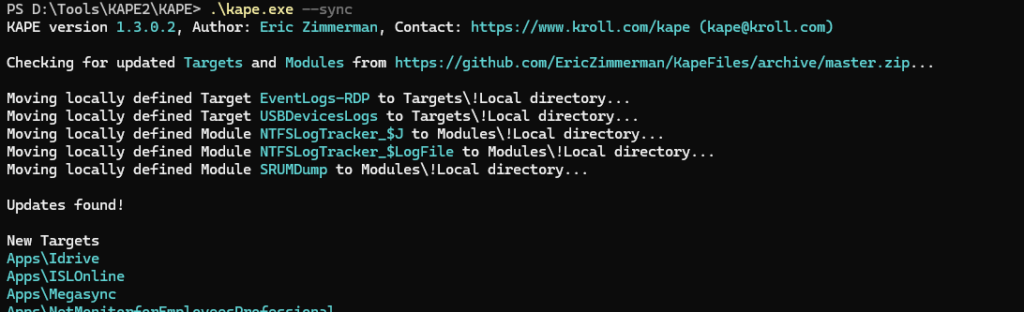
Now that we have updated KAPE, we must download a third-party binary to capture RAM. Go to Velocidex’s WinPmem tools GitHub and download the latest version. Download the 64bit version, and rename the executable from “winpmem_mini_x64_xxx.exe” to “winpmem.exe”. Move the “winpmem.exe” file to the “KAPE\Modules\bin\” directory in the KAPE folder.
Lastly, we must convert the KAPE software directory into an ISO file. Since no OS-native tools can do this, I use PowerISO, which is free for our needs. Use PowerISO or another converter software to turn the KAPE directory into an ISO file.
Collecting Data with KAPE
We will perform the following process for each infected system.
- Mount the SMB file share from the ThreatPursuit-VM to the infected system.
- Mount the KAPE ISO from our file share to the infected system.
- Open PowerShell and start the KAPE temporary memory collection, then artifact collection.
To collect data locally from an infected system, we must either remotely connect via RDP or open a console to the system. Once you are in the box, open PowerShell as an administrator and run the following commands.
# Mount our SMB Share we set up on the ThreatPursuit-VM, as drive letter "I"
# Command Overview
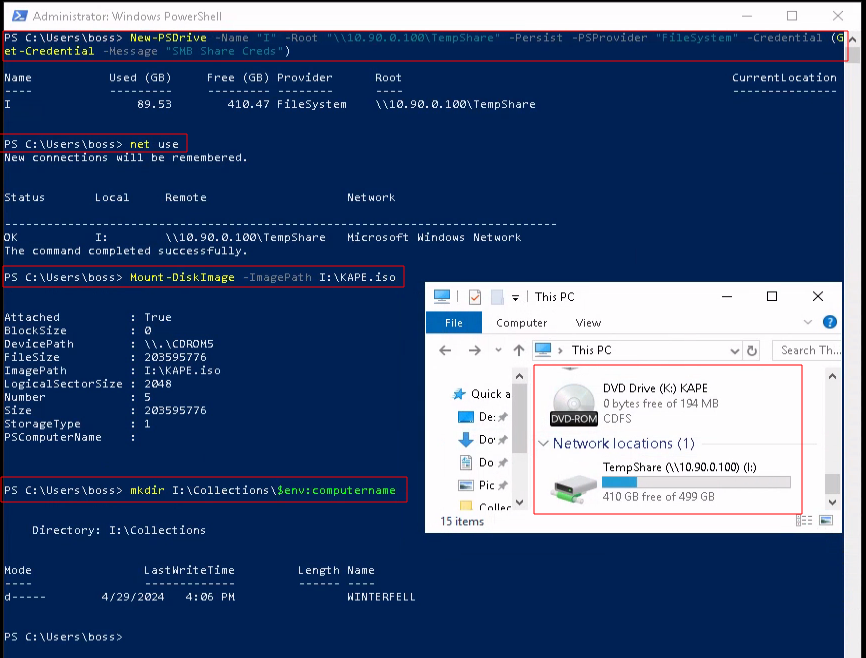
PS C:\Users\boss> New-PSDrive -Name "<DriveLetter>" -Root "<SMB Share Path>" -Persist -PSProvider "FileSystem" -Credential (Get-Credential -Message "SMB Share Creds")
# Example
PS C:\Users\boss> New-PSDrive -Name "I" -Root "\\10.90.0.100\TempShare" -Persist -PSProvider "FileSystem" -Credential (Get-Credential -Message "SMB Share Creds")
# Mount the share we just set up.
PS C:\Users\boss>Net Use
# Mount the ISO file we created from mounted SMB Share drive
PS C:\Users\boss> Mount-DiskImage -ImagePath I:\KAPE.iso
# Create a new folder using the infected systems computer name, in the SMB share collection directory.
PS C:\Users\boss> mkdir I:\Collections\$env:computernameYou may be asking why I am using the New-PSDrive command instead of the New-SmbMapping command. The New-SmbMapping command does not accept Get-Credential, so we would leave a username and password in PowerShell history.
We must start by collecting the system’s temporary memory, RAM, using WinPmem. We want to avoid overwriting existing temporary memory as much as possible, so we should only do the bare minimum to complete the memory collection process.
# Collect temporary memory
K:\KAPE\kape.exe --msource C:\ --mdest I:\Collections\"$($env:computername)" --mflush --zm true --module Velocidex_WinPmem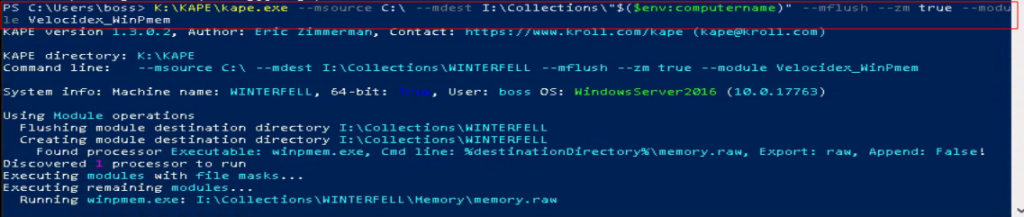
Now, we can perform the KAPE collection. The “!SAN_Triage” and “!BasicCollection” collection scripts gather almost everything we need.
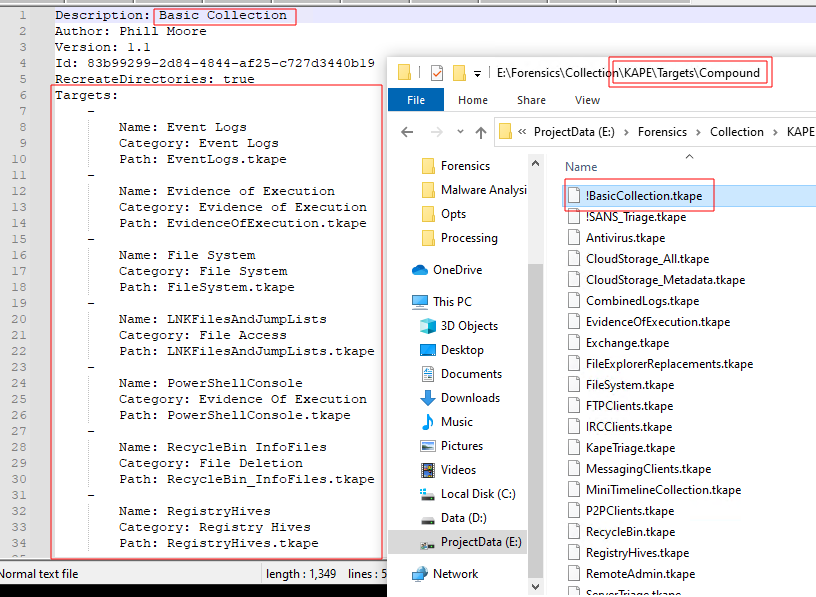
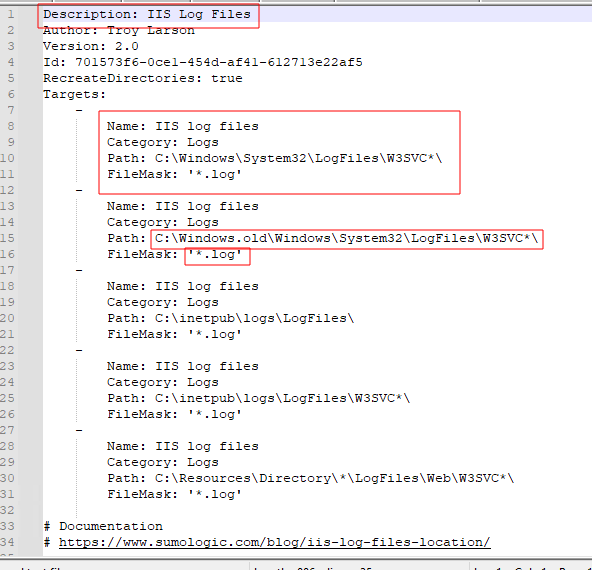
Side Quest: tKape Files
If you want to understand what data a collection process will gather, you can open its “.tKAPE” file(AKA: Target Kape File), which will explain. Tkape files are essentially collections scripts, and one tkape script can reference others tkape scripts. Navigate to the “{YourKapeFolder}\Targets\Compound\” folder, find the tkape you are interested in, and open it in Notepad.
Back to the KAPE Target Collection
Perform the KAPE target collection.
# Run KAPE collection
K:\KAPE\kape.exe --tsource C: --tdest I:\Collections\"$($env:computername)" --target !BasicCollection,!SANS_Triage --zip "$($env:computername)"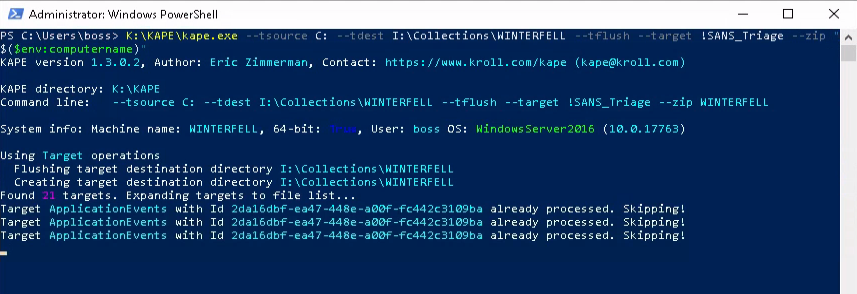
If no issues arise, you should have two new ZIP files created in the SMB file share.
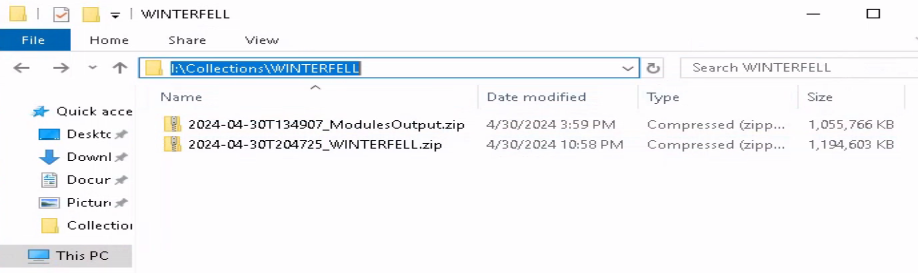
We have collected all the data we need right now.
Kuiper Evidence Ingestion and Processing
What is Kuiper?
Kuiper is a digital investigation platform that provides capabilities for the investigation team and individuals to parse, search, visualize collected evidences…. In addition, collaborate with other team members on the same platform by tagging artifacts and present it as a timeline, as well as setting rules for automating the detection. The main purpose of this project is to aid in streamlining digital investigation activities and allow advanced analytics capabilities with the ability to handle a large amounts of data.
https://github.com/DFIRKuiper/Kuiper/wiki
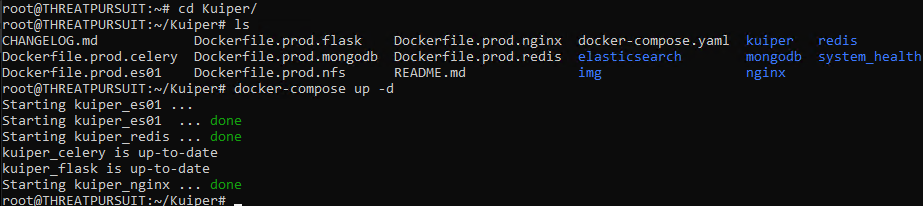
This post will not cover the installation of Kuiper, but it is pretty simple. On your ThreatPursuit-VM, install the Ubuntu Window Subsystem for Linux(WSL). In Ubuntu, install Docker+Composer, and then run the Kuiper Docker-composer script.
Kuiper Ingestion and Processing
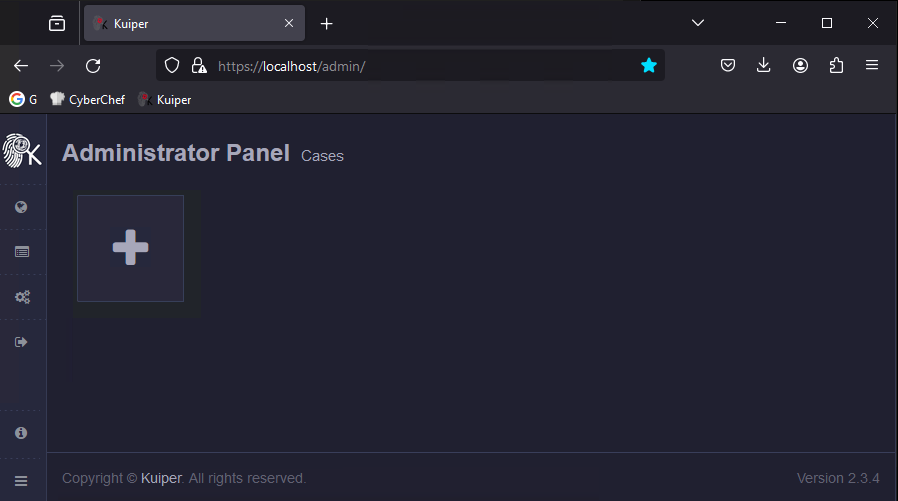
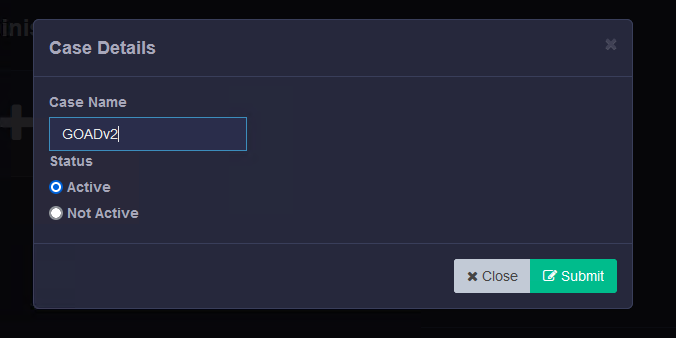
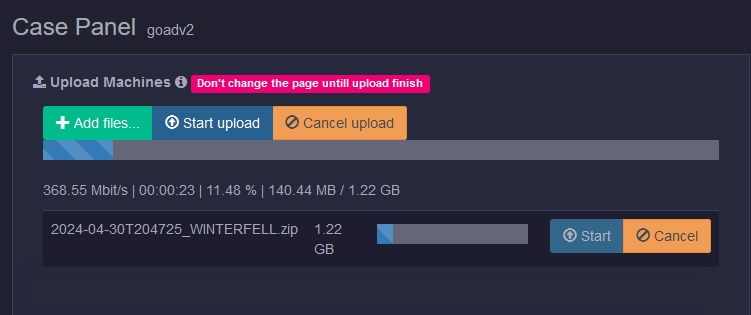
You should now have the Kuiper docker stack running on the local host. Open Kuiper using a web browser. Click the large “+” icon from the Admin panel to add a new case.
Now, let us upload all the machine capture zips. You can upload multiple captures from the same system, and Kuiper can determine they are from the same system.
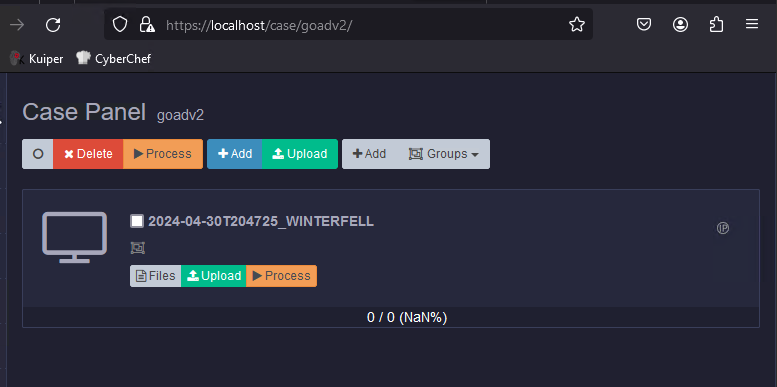
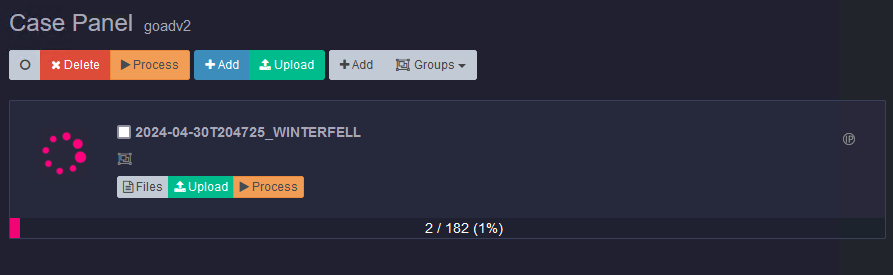
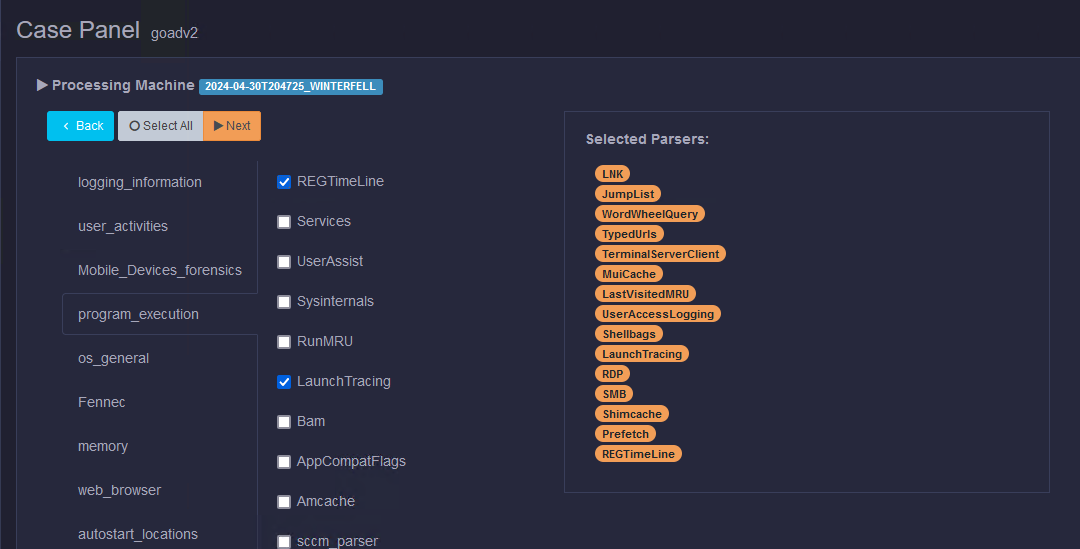
The last step before we can investigate the data is to process it. To start processing the data, go to the machines menu in Kuiper, select one or multiple machines, and then click the Process button. Don’t select all the processing parsers; it will take forever. We want to prioritize data critical to our investigation, like RDP, PowerShell, or SMB logs.
Data will start populating the Kuiper tool from here, and you can start your investigation. The investigation itself is outside the scope of this post. However, I may make a post on this in the future.
Happy Hunting!
TDLR: Incident Response Plan: Windows Data Collection

Collecting data from infected systems can be a long process. However, if we do not need to maintain a legal data collection standard, we can significantly speed up the process. KAPE grabs just the data we need and leaves everything else, and then Kuiper can bulk upload, import, and process the collected data. These tools allow us to jump-start our DFIR engagements to answer those time-sensitive questions.
Resources
- Awesome-KAPE: A GitHub page with useful KAPE links.
- Kuiper Wiki
- WinPmem memory acquisition
- KAPE Documentation
Related posts:
 LetsDefend: Blue Team Training Review
 LetsDefend’s DFIR Challenge: IcedID Malware Family Walk-Through
 LetsDefend’s DFIR Challenge: REvil Ransomware Walk-Through
 How to Stay on Top of Cybersecurity News
Leave a Reply