

PowerShell is a powerful tool essential for managing and automating Windows systems. However, with great power comes great responsibility, and PowerShell’s capabilities are commonly exploited for malicious purposes. As a Windows Systems Administrator, it’s crucial to establish PowerShell best practices to prevent its abuse. In this blog post, we’ll dive into how to use Group Policy Objects (GPO) to do the following.
- Disable PowerShell for all users in a domain.
- Allow selective AD groups, like Systems Administrator and Power-users, access to PowerShell.
- Remove older, insecure versions of PowerShell.
So, whether you’re new to Windows Systems Administration or a seasoned pro, read on to learn more about this critical best practice.
Disable PowerShell for All Users in the Domain
We can start by blocking PowerShell use by all users in the domain. The PowerShell best practice is to only allow users who require it for their job role. So after blocking it for everyone, we will set up exceptions for those with the job role that requires PowerShell.
To block all users in the domain from using PowerShell, do the following.
1. Creating a GPO to Disable PowerShell

Login to your Domain Controller server and open the Group Policy Manager editor. Navigate to the Group Policy Object folder, right-click on it, and click “New“. Name the new policy “Disable All PowerShell” and click ok.
2. Configure the Disable All PowerShell GPO
Right-click on the “Disable All PowerShell” GPO and click edit. Then navigate to the following folder.
User Configuration -> Policies -> Windows Settings -> Security Settings -> Software Restriction Policies
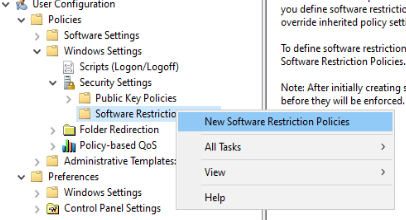
Now right-click the “Software Restriction Policies” folder and click the “New Software Restriction Policies” option.
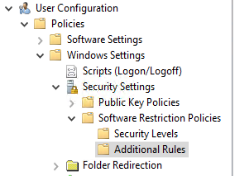
Select the “Additional Rules” folder that will appear in the “Software Restriction Policies” folder. Then right-click “Additional Rules” and click “New Path Rule”.
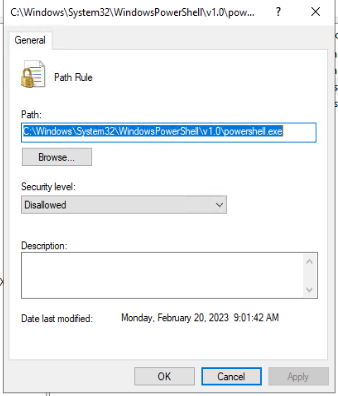
Use the “Browse…” button in the new pop-up window to navigate to the folder “C:\Windows\System32\WindowsPowerShell\v1.0\powershell.exe“. Then select the “Securioty Level” of Disallowed. Lastly, click “OK” to close.
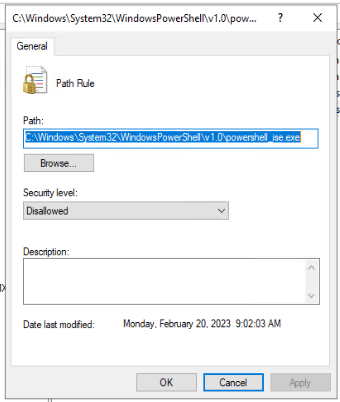
Repeat this “New Path Rule” process to add the PowerShell IDE executable (“C:\Windows\System32\WindowsPowerShell\v1.0\powershell_ise.exe“) since it can also be abused.
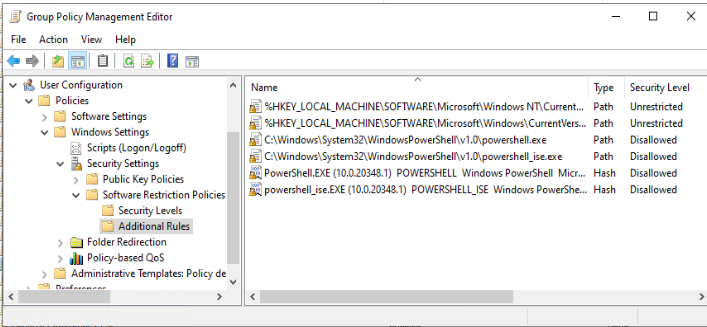
So you should have two Path Rules now.
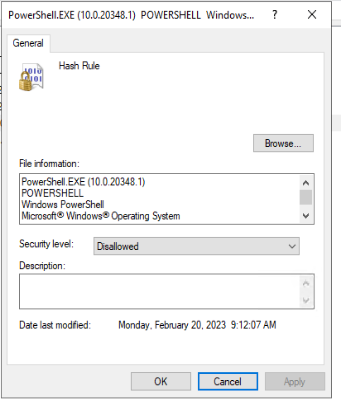
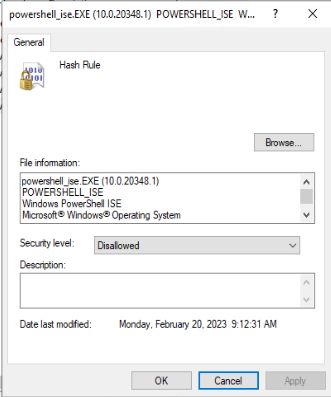
Blocking file paths can be unreliable, so we will again add the two same executables as a file hash. Right-click on “Additional Rules” and select “New Hash Rule”. In the new pop-up window, use the “Browse…” button to navigate to each executable and click “OK” when done. You must create two new hash rules for PowerShell and the PowerShell IDE.
Your GPO should look like mine below if you have done everything correctly.
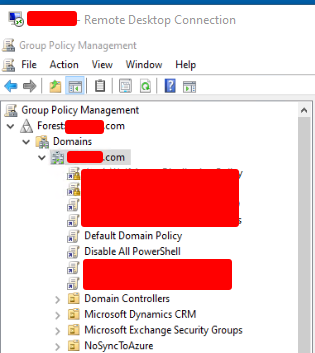
3. Apply the New Disable All PowerShell GPO
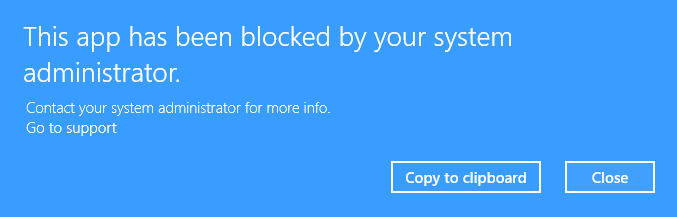
We only need to link the “Disable All PowerShell” GPO to the domain root in Group Policy Manager to apply the new group policy across the whole domain. If users try to use PowerShell, they will be given the below error message.
We now have all PowerShell blocked across the whole domain. However, we have Administrators and Power Users who will need access to PowerShell. So read on to find out how to selectively allow certain job roles access to PowerShell.
Allow Users of Specific Job Roles Access to PowerShell
So we need to allow access to specific job roles that require PowerShell use. This process is very simple if we have designed our Active Directory group structure using the role-based access methodology.
To illustrate the proper way to create an exception to our “Disable All PowerShell” GPO rules, I will walk you through creating an exception for an Identity group named “Tier3-Support“. “Tier3-Support” is an Identity group based on that job role and contains user accounts of employees with that job role. If the above is not making sense, please read this blog post.
1. Create a New ACL Group
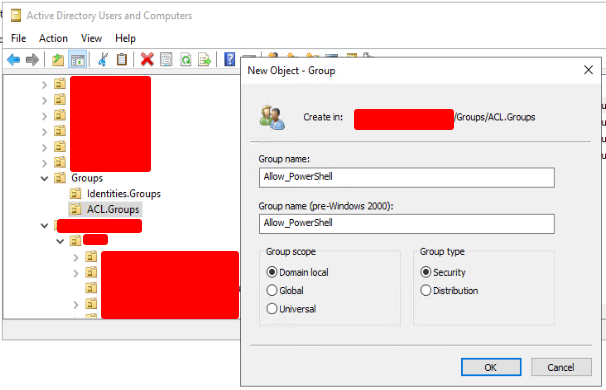
We must create a new Domain Local ACL group in Active Directory named “Allow_PowerShell“(or whatever name you want). Locate the OU to which you wish to add the new group, right-click, and click “New –> Group…“. Fill out the details in the new popup window and click “OK” when done.
2. Add the Identity group to the Allow_PowerShell ACL group
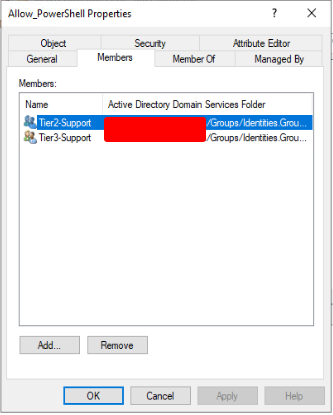
We need to add the Identity groups that will need PowerShell access as members of the newly created “Allow_PowerShell” ACL group. So we will add the Identity group named “Tier3-Support” as a member of the Allow_PowerShell” ACL group. By doing so, the “Tier3-Support” Identity group will inherit the permissions and attributes of the “Allow_PowerShell” ACL group.
Right-click on the “Allow_PowerShell” ACL group and open the properties. Navigate to the “Members” tab and click “Add..” to add the ACL groups requiring PowerShell access. When you have added all the groups that require PowerShell access, click “OK” to apply the changes.
3. Deny the GPO to Allow_PowerShell Users
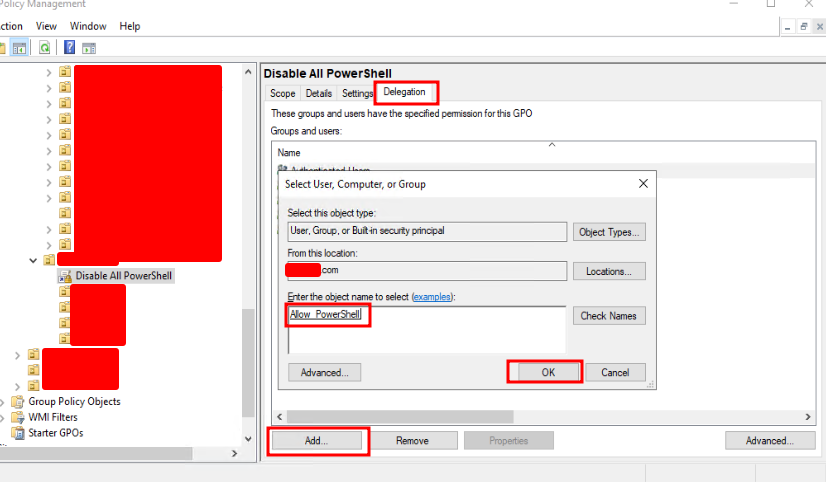
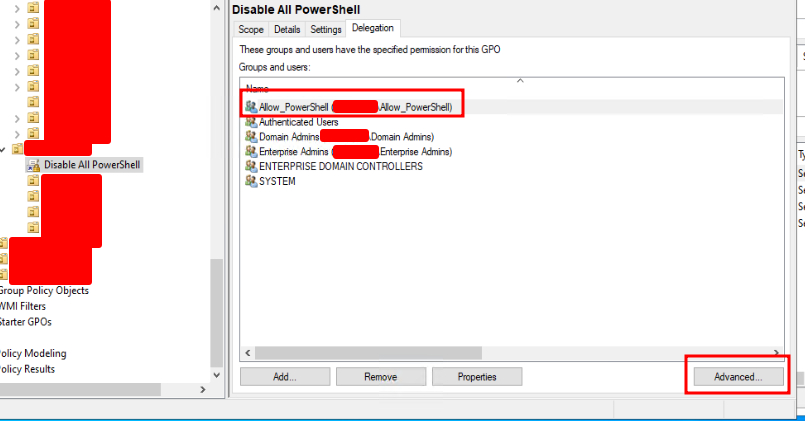
Open the Group Policy Manager again and locate and select the “Disable All PowerShell” GPO we created previously. With the “Disable All PowerShell” GPO selected in the Group Policy Manager window, navigate to the “Delegation” tab. At the bottom of the “Delegation” tab, click “Add…“, then search and select the “Allow_PowerShell” ACL group we set up. Lastly, click “OK” to confirm.
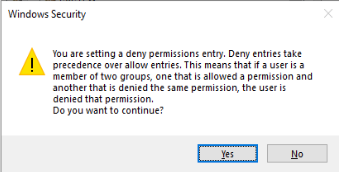
After selecting the “Allow_PowerShell” ACL group, you will have one more confirmation popup like the one below. Just leave it as is and click “OK.”

The last step is to set the “Allow_PowerShell” ACL group permissions within the “Disable All PowerShell” GPO. To ensure that the members of the group do not have the “Disable All PowerShell” GPO applied to them, we will add a deny permission. Thus blocking the policy from being applied and allowing them PowerShell access.
Select the newly added “Allow_PowerShell” group and click “Advanced.”
In the security settings window, click the “Allow_PowerShell” group. Uncheck all the permissions except the following
- Read: Allow
- Apply group policy: Deny
See the screenshot to the right, ensure yours matches, then click “OK“.
You will be asked to confirm the change. Just click “OK“.

That is it! The “Allow_PowerShell” group is now immune to the “Disable All PowerShell” GPO settings. If we need to allow PowerShell for additional job roles, we only need to add their Identity group as a member of the “Allow_PowerShell” ACL group.
Remove Insecure PowerShell Version 2
PowerShell Version 2 is an older version that does not support security features such as script signing, constrained language mode, transcription, logging, etc. This makes it easier for attackers to execute malicious scripts without being detected or blocked. So we should try and limit the ability of attackers to abuse PowerShell by removing PowerShell version 2.
PowerShell version 2 relies on optional windows features being installed, so if we remove these features, we ensure PowerShell version 2 cannot be used. We can remove PowerShell version 2 on one system by running the following command.
PS> Disable-WindowsOptionalFeature -Online -FeatureName MicrosoftWindowsPowerShellV2However, we want to run this command on all systems in our Active Directory environment to remove the feature and rerun it periodically encase someone tries to install it. A PowerShell script to remove the feature and a start-up script group policy object will achieve our goal.
I have written and tested a PowerShell script that will remove the “MicrosoftWindowsPowerShellV2” feature. Download the script from my GitHub at the following URL.
URL: https://github.com/Brets0150/CG_Tools/tree/main/WindowsAdmin/Disable%20PowerShellv2Once you have the script, we can proceed with the GPO setup process.
1. Create a GPO to Remove PowerShell v2
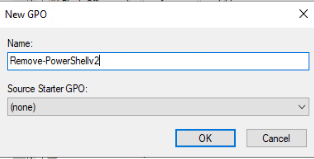
Open Group Policy Manager, navigate to the Group Policy Object folder, right-click on it, and click “New“. Name the new policy “Remove-PowerShellv2” and click ok.
2. Configure Remove PowerShell v2 GPO
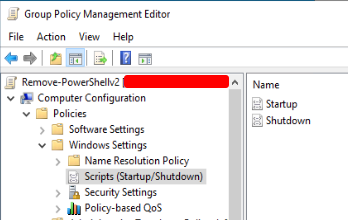
Open the new “Remove-PowerShellv2” GPO to edit it. Navigate to the following folder in the GPO.
“Computer Configuration -> Policies -> Windows Settings -> Scripts (Startup/Shutdown)”
Then do the following.
- Right-click on “Startup” and click “Properties.”
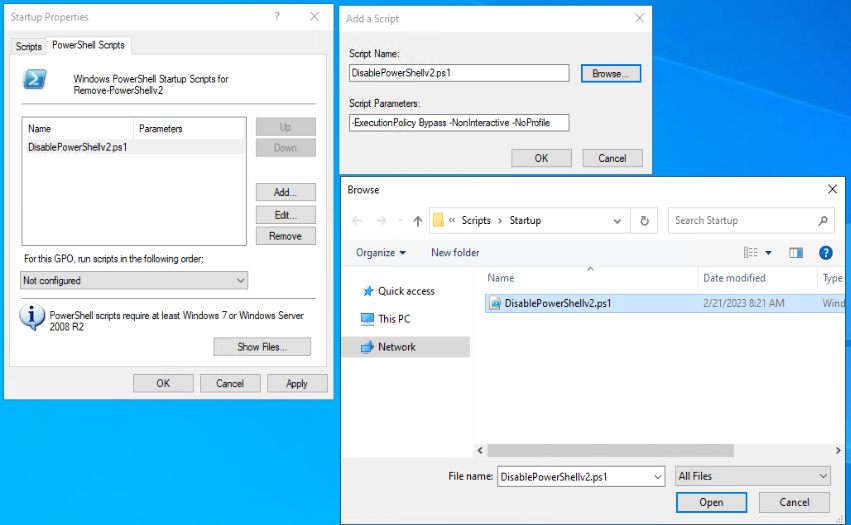
- In the new “Startup Properties” popup, select the “PowerShell Script” tab.
- Click “Add…“
- In the new “Add a Script” popup windows, click “Browse..“
- An Explorer browser window will now appear. Explorer will open to the designated GPO unique ID folder within the SYSVOL. You can copy and paste the “DisablePowerShellv2.ps1” script that we downloaded previously into this Explorer window. Then select the script and click “Open” to close the Explorer window.
- In the “Add a Script” window, Add the following to the “Script Parameters” box “-ExecutionPolicy Bypass -NonInteractive -NoProfile” and click “OK” to close the “Add a Script” window.
- Click “OK” in the “Startup Properties” and GPO editing windows to save the changes.
3. Apply the Remove PowerShell v2 GPO
The last step is to link the new “Remove-PowerShellv2” GPO to your OU that contains all your computer objects; servers, and desktop clients. Alternatively, you can apply it to the domain root to ensure it covers all computers. Domain-joined computers will see the new GPO the next time they reboot, then on the next reboot, the startup script GPO will be applied. This means it will take two complete reboots before PowerShell v2 is removed.
PowerShell Best Practices for Preventing Abuse Wrapup: TLDR

To wrap up this overly verbose blog post, here are the key ways of preventing PowerShell abuse.
- Only allow users who require PowerShell for their job to have access.
- Remove all old and prone-to-misuse versions of PowerShell.
By implementing these methods, enterprises can reduce the risk of PowerShell abuse by attackers and improve the security of their networks.
The last PowerShell best practice I did not cover here is PowerShell transcript logging. I was going to cover this in this post, but the post was getting too long. So I will cover this topic in my next blog post.
Related posts:
 AD Hardening Against Kerberos Golden Ticket Attack
 AD Hardening: Inactive Computer Objects
 Free Active Directory Security Tools
 Operating System Hardening 101
 Linux Web Server Hardening: The Basics
 Linux Web Server Hardening: Preventing Apache Information Disclosure
 Building Active Directory Groups For Role-based Access
Leave a Reply